
Paper flowers aren’t just another little DIY—they’ve got this timeless charm to them. You can dress them up for weddings, birthdays, or just use them to make a space feel a bit more cheerful. And the best part? They’re actually really calming to make. There’s something kind of meditative about folding, shaping, and just watching something beautiful come together from, well… paper.
What makes them so great is that anyone can do it. Seriously. You don’t need to be super crafty or have a bunch of fancy tools. With a bit of patience, you can make flowers that look like they came straight out of a boutique. Plus, they last way longer than real ones, and you can tweak them however you like—colors, shapes, size—totally up to you. They also make really thoughtful gifts because they feel personal.
This guide’s here to help no matter where you’re starting from. Never made a paper flower in your life? No worries. Already know your way around a glue stick? You’ll still pick up a few tricks. We’ll go over the basics, share a couple of tips that make a big difference, and by the end, you’ll have some beautiful, handmade blooms you’ll be proud of.
How to Make Crepe Paper Flowers: A Simple DIY Guide
Crepe paper is known for its flexibility and realistic texture, which makes it ideal for creating stunning, lifelike flowers. Let’s get started by diving into the essential steps of crafting your very own beautiful crepe paper blooms.
Step 1: Gather Supplies for Crafting Beautiful Crepe Paper Flowers
Before you get started, it’s crucial to have all the materials you need at hand. Here’s a detailed look at what you’ll require:
Crepe Paper
If you’re going to make paper flowers, crepe paper is pretty much your MVP. Go for the good stuff—180 gsm is ideal because it stretches and has this nice texture that actually looks a lot like real petals. You can get it in just about any color you can think of, whether you’re into bold reds or softer pastels. Honestly, half the fun is picking your palette.
Scissors
Don’t just grab the old kitchen scissors. A sharp, clean pair makes all the difference. Dull ones will tug at the crepe paper and leave messy edges—and yeah, it shows. Good scissors = clean cuts = better-looking petals.
Glue
You’ve got two solid options here: tacky glue or a hot glue gun. Hot glue’s faster—it sets almost instantly—but tacky glue gives you a little wiggle room to reposition stuff before it dries. Depends on how patient you’re feeling, honestly.
Floral Wire
This is what gives your flowers their shape. You’ll want a few different wire gauges depending on the look you’re going for—thicker for big, bold blooms and thinner for more delicate ones. It’s what holds everything together, so don’t skip it.
Floral Tape
It might not look like much, but floral tape pulls it all together—literally. It wraps around your stem and keeps everything nice and neat. Bonus: it kind of melts into the crepe paper when you stretch it, so the finish looks super clean without much effort.
Step 2: Cutting and Shaping Petals for Realistic Crepe Flowers
When it comes to making your petals, a little patience goes a long way. The cutting and shaping part might not sound super exciting, but honestly, it’s where the magic starts to happen.
Cutting the Petals
You’ll want to start by cutting out your petal shapes from the crepe paper. You can totally use a template if you want everything neat and uniform, but sometimes freehand looks even better—kind of natural and a little wild, like real petals. How many you’ll need depends on the flower, but somewhere between 6 and 12 per bloom usually works. Don’t stress the number too much—you’ll get a feel for it as you go.
Shaping Them
Here’s where crepe paper gets cool. It has this little bit of stretch to it, and when you gently pull at the edges, the petals start to curve and take shape, kind of like they’re coming alive in your hands. If you want that soft, lifelike feel, stretch just enough to give it volume—not too much or it’ll tear. But once you get the hang of it, you’ll know exactly how far to go.
Mixing Up the Sizes
Real flowers aren’t perfectly symmetrical, so don’t be afraid to play with petal size. A nice trick is to start with smaller petals in the center and go bigger as you move out. That layering gives the flower more depth and makes it look a whole lot more realistic—even a little dramatic if you want it to.
Step 3: Assembling Your Crepe Paper Flowers with Ease
Alright, once your petals are all cut and shaped, it’s time to bring your flower to life—and honestly, this part’s kind of satisfying. You’re basically just layering and building, and before you know it, that flat paper turns into something really pretty.
Layering the Petals
Start with the smallest ones. You’re going to glue them right onto the floral wire, one by one. It helps to overlap them just a bit so the flower feels full, but not too tight—you still want that open, blooming look. Oh, and make sure the wire stays tucked in and hidden in the center. That part matters more than you think once everything’s in place. As you go, gradually add in your bigger petals. The outer ones kind of fan out and give the whole thing a fuller, more realistic shape. You’ll see it start coming together as you layer.
Building the Center
If you’re making something like a rose or peony, you’ll want to start with a tight little roll of crepe paper in the middle—that gives it some shape and depth. But if you’re doing daisies or something more simple, you can just scrunch up a small piece of crepe or even pop a bead in the middle. That little detail makes a big difference, especially if you’re going for that handmade-but-polished look.
Finishing It Off
Once everything’s glued and you’re happy with the shape, grab your floral tape and wrap it around the base. It holds everything together and gives the stem that clean, finished look. Plus, it makes the flower feel a bit sturdier. After that? You’re done. Or—if you’re like me—you’ll probably still tweak it for another five minutes. But that’s part of the fun.
Easy DIY Tissue Paper Flowers for Every Occasion
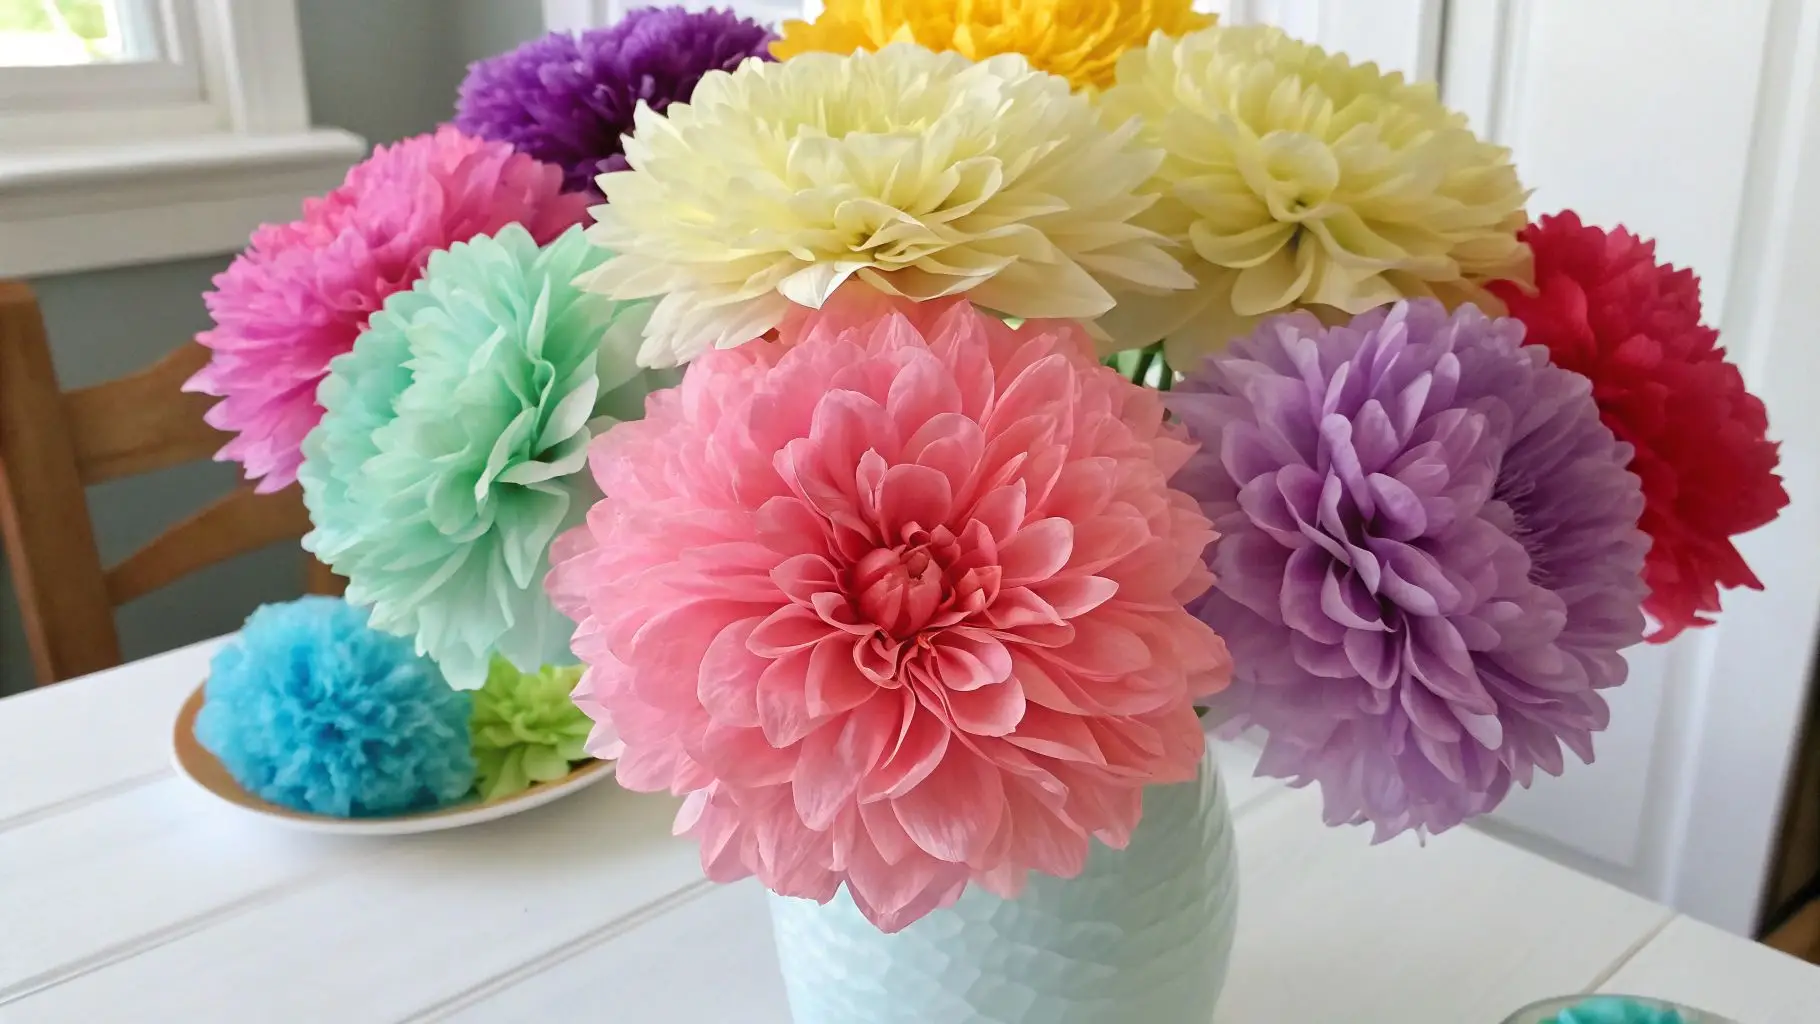
Tissue paper flowers are a total classic—and for good reason. They’re quick, easy, and honestly kind of addictive once you get started. Super light and fluffy, they’re perfect for decorating just about anything—parties, gifts, your workspace, even a random empty shelf that just needs something.
If you’re looking for a simple project that still feels creative and satisfying, these are a great go-to. Let’s walk through how to make these soft, cheerful little blooms without overcomplicating things.
Materials Needed for Simple Tissue Paper Flower Crafts
Creating tissue paper flowers is both affordable and easy. Here’s a breakdown of the materials needed:
Tissue Paper
Grab a mix of colors depending on what you’re making them for. Brights—like red, yellow, pink—are great if you want something fun and loud, like for a birthday party or just to cheer up a space. Softer tones like lavender or white feel more elegant, so they’re perfect for weddings or baby showers. Honestly, even mixing bold with muted can look amazing.
Scissors
This might sound obvious, but yeah—use sharp scissors. Clean cuts make a big difference when you’re layering tissue paper. If your scissors are dull, the paper can tear or get crinkled in weird ways.
Pipe Cleaners or Floral Wire
Either one works fine. These are basically your stems, but they also help hold everything together. Pipe cleaners are great if you’re working with kids or want to add a pop of color to the stem. Floral wire is better if you’re going for a cleaner, more polished look.
Glue (Totally Optional)
You don’t always need glue, but if you’re worried the flower might come apart—especially if it’s getting moved around or used for decor—adding a little dab where the petals meet can help keep things secure.
Folding and Fluffing Tissue Paper to Create Full Flowers
Alright, here’s where all the fluffiness and volume really happens—it’s the folding and fluffing that turns flat tissue paper into something that actually looks like a flower (and not just… stacked paper). It’s simple once you get into the rhythm.
Folding
Start by stacking about 5 to 8 sheets of tissue paper—more if you want a bigger, fluffier bloom. Fold the whole stack back and forth like an accordion. Each fold should be about an inch wide, but honestly, don’t stress about making them perfect. As long as they’re even-ish, you’re good. The more folds you’ve got, the fuller your flower will look when it’s done.
Securing the Center
Once it’s all folded, grab a pipe cleaner or a bit of floral wire and twist it around the center nice and tight. That’s what’s going to hold everything together while you shape the flower. You can even leave some of the wire hanging out the bottom to act like a little stem.
Shaping the Edges
Now comes the fun part: trimming the ends. If you round the edges with scissors, you’ll get soft, puffy blooms—kind of like carnations. But if you cut them into a pointy V shape, the petals will have more of a spiky, dramatic look (think dahlias or lilies). Try both and see which vibe you like better.
Fluffing It Out
This step is a bit delicate but super satisfying. Start pulling each layer of tissue paper apart—one at a time—from the top to the bottom. Go slowly so you don’t rip anything. Once all the layers are separated, start fluffing and adjusting until it looks full and natural. It’s kind of like waking the flower up.
Arranging Your Tissue Paper Flowers for Stunning Displays
Now that you’ve made your tissue paper flowers, here’s where things get fun—putting them to use!
Stick Them in a Vase
Group a bunch of them together in a vase for a bright, cheerful centerpiece. Mix and match colors and sizes for a more playful look, or keep it all one color for something a bit more elegant. You can even throw in a few sprigs of faux greenery if you want to take it up a notch.
Decorate a Gift
Tired of boring bows? Stick a flower on top of a wrapped gift. It adds a handmade, thoughtful touch and looks so much nicer than a store-bought ribbon. Bonus: the flower becomes part of the gift.
Party Decor That Pops
These flowers are made for parties. String a few together as a garland, hang them on the wall, or lay them flat as table centerpieces. They’re lightweight, easy to move around, and instantly make the space feel festive—whether it’s a birthday, a wedding, or a last-minute baby shower.
Affordable Paper Flower Supplies for Beginners
The best part about making paper flowers? You really don’t have to spend a ton of money to get beautiful results. With a little creativity (and some smart shopping), you can keep things affordable and still end up with flowers that look amazing.
Saving Money on Supplies Without Sacrificing Quality
Shop Smart
If you’ve ever wandered through the craft aisle, you know things can add up fast. But don’t skip the sale bins—your local craft store almost always has deals, coupons, or seasonal markdowns. You might score some really nice paper for half the price just by timing it right.
Reuse What You’ve Got
You’d be surprised what you can turn into petals. Old wrapping paper, magazines, scraps from past projects—even fabric if you’re feeling experimental. Not only does it save cash, but those reused materials can actually give your flowers some unique textures and colors that you wouldn’t get from new paper.
Go Bulk When You Can
If you know you’ll be making more than a couple flowers, buy your go-to supplies in bulk—things like crepe paper rolls, floral wire, or floral tape. It might feel like more upfront, but it saves money long term and you’ll always have extras on hand when inspiration strikes.
Picking the Right Paper for the Look You Want
The kind of paper you use totally changes the vibe of your flower. Here’s a quick breakdown of what works best for what:
Crepe Paper
This one’s a favorite for a reason. It’s got stretch, which makes it easy to shape into realistic petals. If you’re making something detailed—like roses or peonies—this is your best friend. It holds form and adds a little drama in the best way.
Tissue Paper
Tissue is great when you want something light and fluffy. Think carnations, pom-poms, daisies. It doesn’t hold shape quite like crepe, but for big, soft blooms? It’s perfect. And bonus—it’s cheap and comes in every color imaginable.
Cardstock or Construction Paper
If you’re going for clean, bold shapes—like lilies or tulips—cardstock works really well. It’s stiffer, so it won’t curl as much, but it holds its form beautifully and is super easy to cut. Plus, it’s a great option for kid-friendly projects since it’s a little sturdier.
Essential Tools for Easy Paper Flower Crafting
For a smoother crafting experience, make sure you have these essential tools on hand:
- Sharp Scissors: Clean, sharp scissors will give you precise, clean cuts, which are essential for creating beautiful paper flowers.
- Craft Glue: A good-quality glue (like tacky glue) ensures that the petals and other elements stay in place without causing wrinkles or ripples in the paper.
- Floral Tape: This tape is flexible and blends well with paper flowers, helping to secure the stems while maintaining a polished appearance.
Creative Ideas for Paper Flower Home Decor
If you want to add a little something special to your home without a big overhaul, paper flowers are an awesome way to do it. They’re super versatile and can fit just about any style or space—from quick little projects to something a bit more involved.
Paper Flower Wall Art: Easy, Whimsical, and So Pretty
Floral Garlands
One of my favorite quick fixes is stringing paper flowers onto twine or string. Hang that over a window, along a wall, or around a doorframe—instant charm and color without much effort. It’s fresh, lively, and perfect if you want something that feels a little playful but still stylish.
Wall Hangings
If you want to get a bit more creative, try arranging your flowers on a canvas or inside a frame. You can go totally abstract and artsy or keep it neat with something like a flower wreath. Either way, it makes your walls pop with personality and texture.
Making Table Centerpieces That Wow
Paper flowers are great for centerpieces, especially when you want something lasting but still vibrant.
Layered Looks
Mix big and small flowers to build a full, interesting display. Throw in some candles, greenery, or even faux flowers for extra dimension. It’s all about playing with sizes and textures to make it look rich and inviting.
Seasonal Themes
Think about the season or event. For fall dinners, warm, autumn tones really hit the mood. For summer barbecues? Bright, bold colors bring all the good vibes. Tailoring your centerpiece this way makes it feel thoughtful and festive.
Adding Paper Flower Flair Around Your Home
Paper flowers aren’t just for big projects—they’re great little pops of joy anywhere.
Shelf Decor
Pop a few paper blooms into small vases or pots and tuck them onto shelves. It’s a sweet, unexpected detail that instantly lifts the space.
Mirror Makeovers
If you want a quick statement, try gluing some flowers around the edge of a mirror. It turns a simple piece into a beautiful focal point, adding softness and color where you might not expect it.
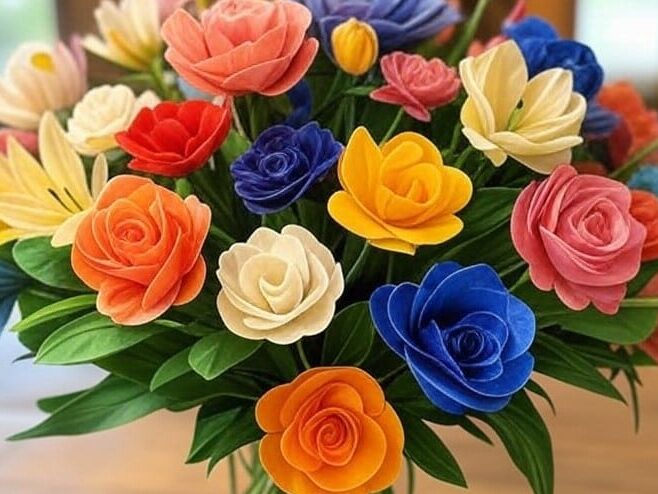
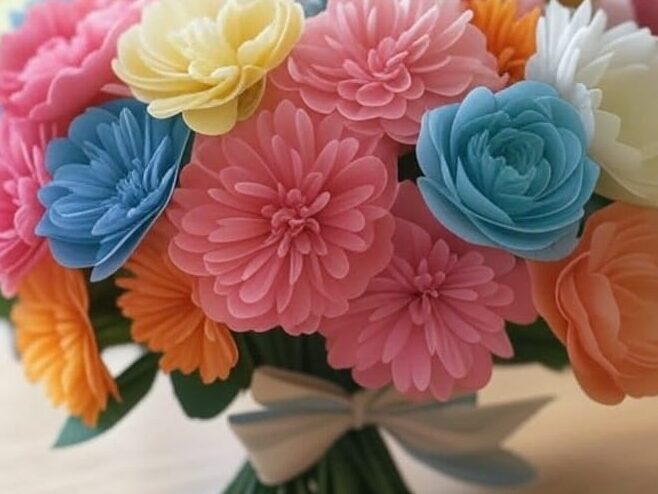
Handmade Paper Flower Bouquets: A Personalized Gift Idea
A handmade bouquet of paper flowers isn’t just a gift—it’s something timeless and truly memorable. If you want to take your bouquet up a notch, here’s how you can make it stand out.
Picking Your Flowers
Try mixing different kinds—roses, lilies, daisies, whatever you like. Having a variety of shapes and sizes makes the bouquet feel more dynamic and interesting. It’s like giving a little garden in someone’s hands.
Add Your Personal Touch
Little extras go a long way. Maybe tie it with a ribbon in the recipient’s favorite color or attach a handwritten note. Those small personal details make a big difference—they show you really put thought into it.
Gift Ideas That Won’t Break the Bank
If you’re trying to keep things budget-friendly but still want your gift to feel special, paper flower bouquets are perfect. They work for birthdays, anniversaries, or even just to say thanks. Plus, since they last so long, they’re a gift that keeps on giving.
Conclusion
Honestly, paper flowers are such a fun and easy craft that anyone can pick up. With just a few materials and a little patience, you can make beautiful, realistic blooms that don’t wilt or fade. Whether you’re decorating your home, giving a thoughtful gift, or creating something for a special occasion, the possibilities are endless. So, gather your supplies and dive in—you’re closer than you think to making your own gorgeous paper flowers!
FAQs
1. What materials do I need to make crepe paper flowers?
To make crepe paper flowers, you’ll need crepe paper, scissors, glue, floral wire, and floral tape. These basic supplies will help you create beautiful and realistic flowers.
2. How do I make tissue paper flowers?
To create tissue paper flowers, fold several sheets of tissue paper in an accordion style, secure the center with floral wire or a pipe cleaner, trim the edges, and then fluff each layer to form a full flower.
3. Can I make P.flowers on a budget?
Yes! You can find affordable supplies by looking for sales, buying in bulk, and reusing materials like scrap paper or old books. Tissue and crepe paper are both budget-friendly options.