
In a world full of cookie-cutter decor, painted mason jars are like a breath of fresh air, letting you splash your personality all over your home. I got into these last weekend, and my kitchen’s got this cozy, rustic glow now that no store-bought stuff could match. Whether you’re aiming for a vintage living room vibe or a farmhouse kitchen feel, these jars are super versatile. All you need is a handful of supplies, a spark of creativity, and maybe a little patience—okay, a lot for me. This guide’s got you covered with why these jars are awesome, how to start, plus tips, steps, and pitfalls to dodge.
Ready to turn plain glass into something totally your own? Let’s get messy and make some art!
Why Painted Mason Jars Are a DIY Must-Have
Emotional Value and Personal Connection
There’s something special about making stuff with your own hands, like painting mason jars—it’s not just decor, it’s like bottling up memories and creativity. I painted some for a friend’s wedding last month, and every brushstroke felt like a little gift. Whether it’s a centerpiece for a spring party or a quirky bookshelf accent, each jar’s got a story. I read in the American Journal of Lifestyle Medicine that crafts like this can actually boost your mental health, like a mini meditation session. It’s true—slapping paint on a jar chills me out and makes me smile, turning those little glass guys into more than decor; they’re like happy anchors in my space, even if my paint job’s a bit wonky.
Versatility in Home Decor
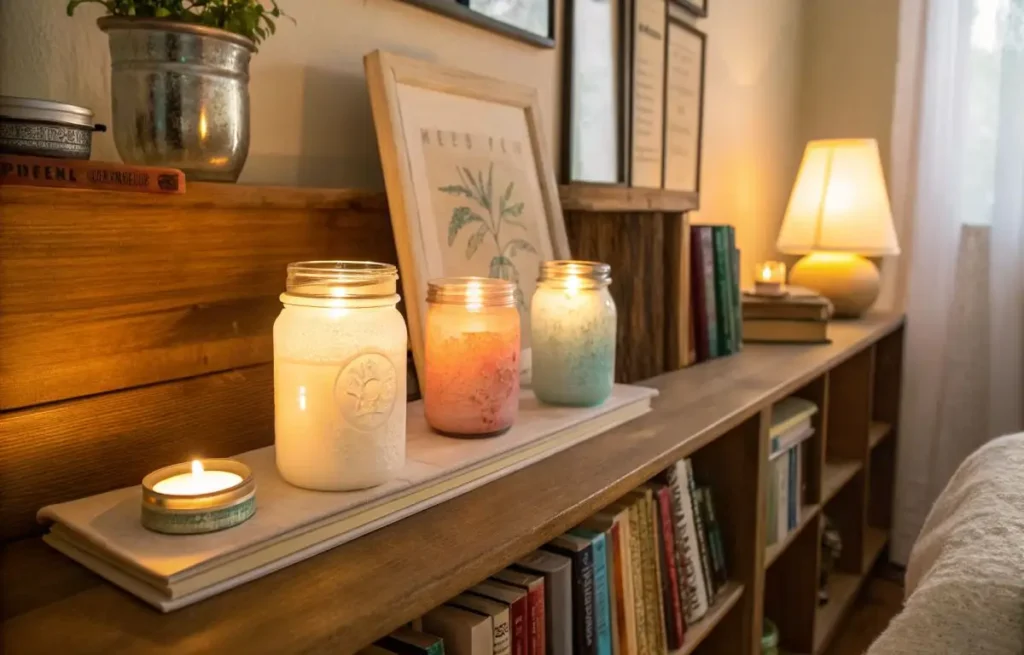
The thing about mason jars is—they’re kind of magic. You can do so much with them. They work as vases, storage containers, candle holders, or just pretty little accents on a shelf. Whether your style leans farmhouse rustic or more clean and modern, painted mason jars somehow always fit right in. They’re perfect for everything from weddings and holiday centerpieces to just sprucing up a bathroom shelf.
And honestly, they’re way cheaper than buying fancy organizers or decor from a store. The best part? You can customize them however you want. Paint them in bold colors, use stencils for patterns, wrap them with lace or twine—there are no rules. Mix different sizes for a layered look, and suddenly your $1 jar looks like a boutique piece.
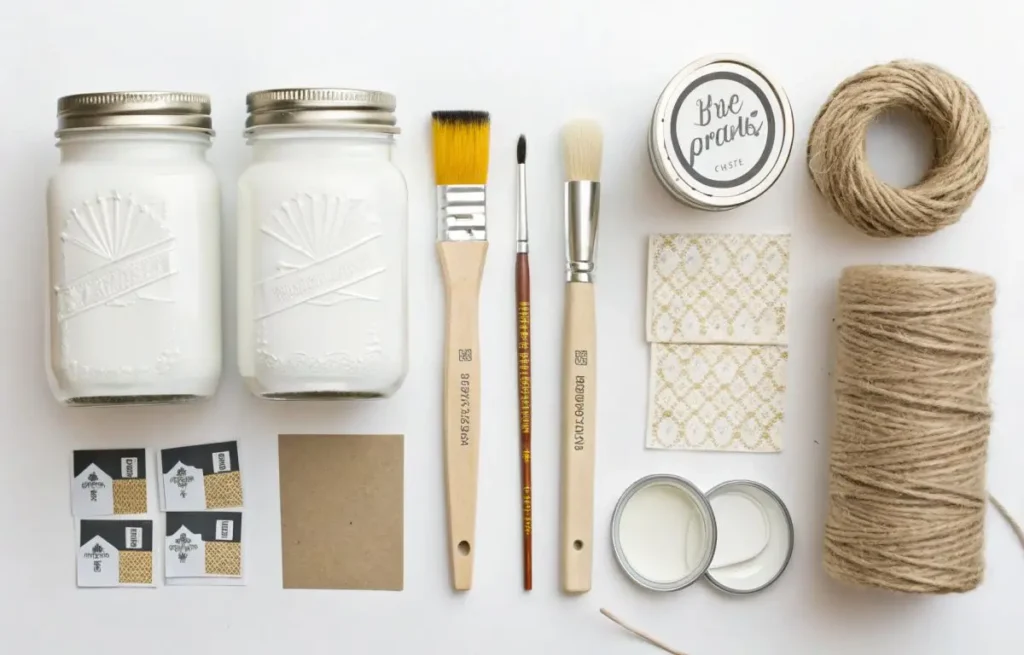
Tools and Materials You’ll Need to Get Started
The Best Mason Jars for DIY Projects
Not all mason jars are created equal when it comes to painting. If you want a smooth, clean look—especially if you’re using stencils or decals—go for the ones with plain, smooth sides. They’re just easier to work with. Those pretty quilted or textured jars can look amazing, especially if you’re going for a vintage or rustic vibe, but heads up: they’re definitely trickier to paint neatly. The details can make the paint go on unevenly if you’re not careful.
Size-wise, it really depends on what you’re making. Smaller jars (like the 16 oz ones) are great for things like little vases, pen holders, or bathroom organizers. If you’re thinking bigger—centerpieces, kitchen storage, that kind of thing—go with quart-sized (32 oz) jars. Oh, and before you start, give each jar a good once-over. Cracks, chips, or weird bumps can mess with how the paint sticks, so it’s worth checking ahead of time.
Selecting the Right Paint
The paint you use totally changes how your mason jars turn out, so it’s worth choosing the right one for the look you’re going for.
If you love that soft, chalky, kind of vintage vibe, chalk paint is the way to go. It sticks to glass really well and you don’t even need a primer—just paint and go. It’s perfect for that slightly weathered, rustic look that feels cozy and handmade.
On the flip side, if you’re into color and shine, acrylic craft paint is a solid choice. It gives you those bold, glossy finishes—but it can be a bit slippery on glass, so using a primer first helps a lot. And if you’re after something more delicate or elegant, glass paint gives a really pretty frosted effect. It’s semi-transparent and catches the light in such a nice way—great for candle holders or anything decorative.
One thing you don’t want to skip: sealing. A clear sealer—either matte or glossy depending on your style—makes all the difference. It protects the paint from scratching or peeling, especially if the jars are going to get handled or be near water. Just give it a light spray at the end, and your jars will hold up way better over time.
Tools You’ll Need
Here’s a quick rundown of the essential tools to get started:
- Foam brushes are kind of a must. They make the paint go on smoother than regular brushes, and you don’t get those annoying streaks.
- Painter’s tape is great if you’re trying to keep edges neat or do fun things like color blocking or that ombré fade. I’ve messed up enough times to know tape saves you from headaches later.
- Stencils can be a lifesaver if you’re not great at drawing (hi, same). I’ve used them for floral patterns and even letters—it makes it look like you put in way more effort than you actually did.
- Toothpicks and cotton swabs — these sound random, but trust me, when you get paint in the wrong spot or your hand slips, they’re perfect for tiny fixes. I always keep a few nearby just in case.
- Fine-grit sandpaper — okay, if you like the distressed look, this is how you get it. Just lightly scuff the edges after it dries and it instantly gives that old farmhouse feel.
- And finally, twine, lace, or ribbon — little extras that just finish it off. Wrap a bit of twine around the top, tie on some lace… it adds charm without much effort.
5 Beautiful Painted Mason Jar Ideas to Try Today
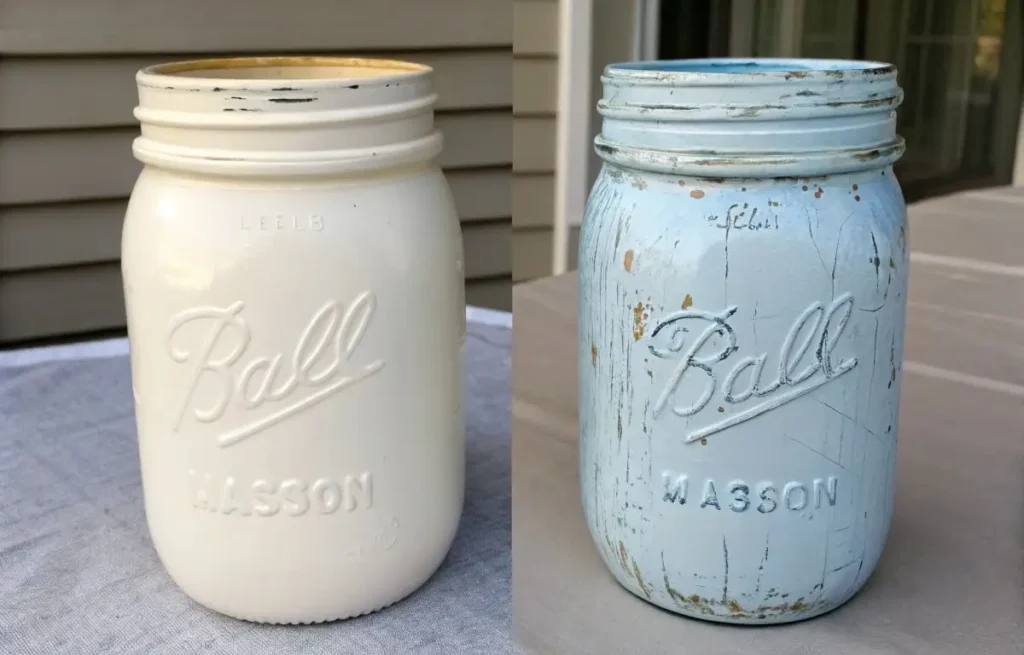
Chalk-Painted Mason Jars with a Vintage Touch
Step-by-Step Guide:
- Prepare the jar: Clean it thoroughly with soap and warm water. Dry it completely before beginning.
- Apply chalk paint: Use a foam brush to apply the first layer of chalk paint. Allow it to dry for 30 minutes.
- Apply a second coat: For full coverage, add a second layer of chalk paint. Let it dry for another 30 minutes.
- Distress the jar (optional): Lightly sand the jar to create a worn, vintage look.
- Seal the paint: Use a clear matte spray or wax to protect the painted surface.
- Decorate: Add twine, lace, or faux flowers to complete the look.
Chalk-painted mason jars are kind of the go-to if you’re aiming for that warm, rustic feel—whether it’s for a wedding table or just sprucing up a cozy kitchen corner. I’ve seen them used as centerpieces with soft florals or even just holding utensils on a counter, and they always look charming without trying too hard.
And here’s the thing—colors like taupe, dusty rose, and those muted, earthy tones? They’re everywhere in farmhouse-style decor lately. I remember reading that Sherwin-Williams even mentioned them as big favorites a few years back, and honestly, they’ve stuck around for a reason. These colors make the jars blend right in with that soft, lived-in aesthetic that’s both modern and a little nostalgic.
Seasonal Painted Mason Jars
Step-by-Step Guide:
- Pick your colors first — super obvious, but it helps to have a theme in mind. Red and green for Christmas? Classic. Orange for Halloween, pastels for spring—you get the idea. Sometimes I’ll even mix in metallics for a little extra pop.
- Start with a good base coat — acrylic if you want it glossy, or chalk paint if you like that soft, matte look. Chalk paint is my personal favorite—it just has that cozy, handmade vibe.
- Stencils are a fun way to get festive — snowflakes in winter, little pumpkins in the fall, maybe some flowers or even bunnies in spring. You don’t have to be artistic—just stick, dab, peel. Done.
- Distressing is totally optional, but it does add character. I usually dry-brush a little white or gold paint over the edges or use a bit of gold leaf if I’m feeling fancy. It makes the jar look like it’s been around for a while—in a good way.
- And don’t skip the sealer. Whether you like matte or glossy, that final spray keeps everything from chipping or fading. Especially important if the jars will be handled a lot or used outside.
Honestly, adding those handmade, personal elements to your decor really does something. There’s even research out there (I think the American Psychological Association mentioned it) showing that when we add personal or creative touches to our home, it actually helps us feel more connected and grounded in our space. So yeah, these little jars aren’t just cute—they’re kind of good for the soul, too.
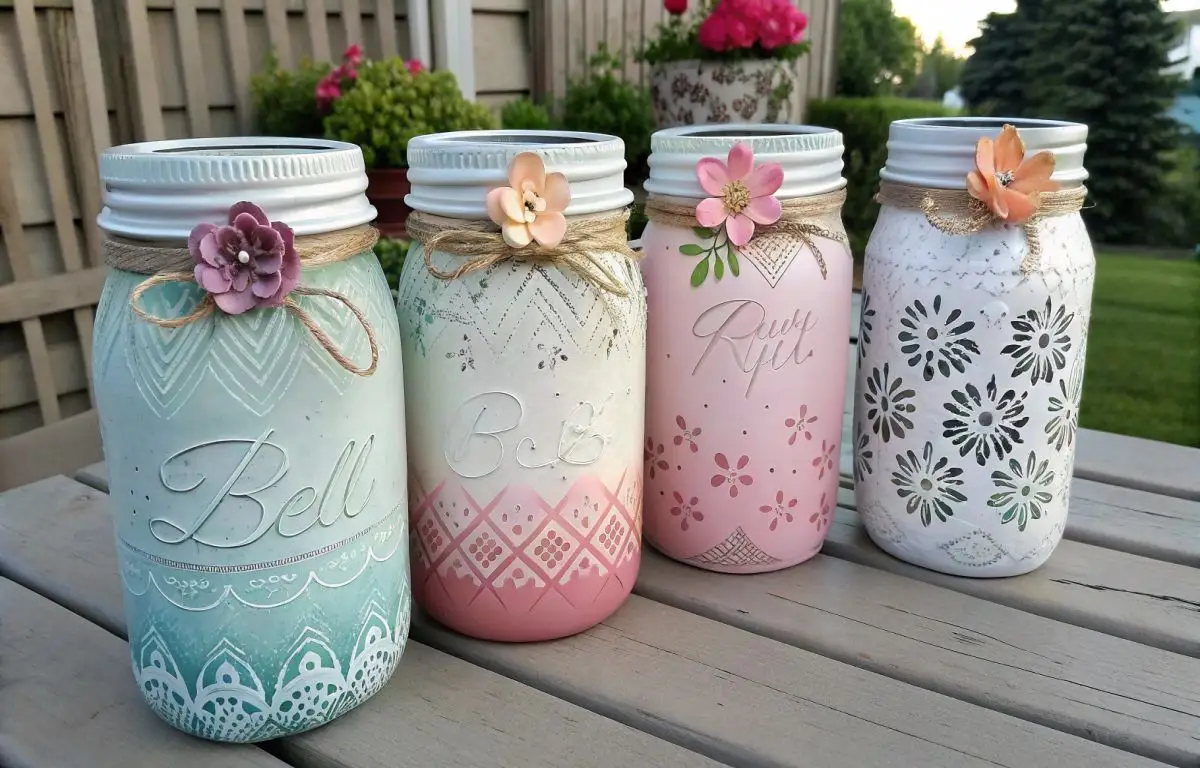
Personalized Painted Mason Jars for Gifts
Step-by-Step Guide:
- Paint a neutral base: Use white, cream, or light gray for a clean backdrop.
- Add custom messages: Using stencils or a fine-tipped brush, write names, dates, or messages.
- Embellish with details: Paint flowers, hearts, or symbols that reflect the occasion.
- Seal the jar: Protect the design with a clear coat of gloss or matte sealer.
- Fill it: Personalize the jar further by filling it with sweets, photos, or small trinkets.
Personalized mason jars make such thoughtful gifts—whether it’s for a wedding, a birthday, or even just a little holiday surprise. You can customize them with names, dates, favorite colors, or even inside jokes if you’re feeling playful. It’s that kind of personal touch that makes people feel really seen.
And apparently, there’s some research backing this up too. I remember reading something in Harvard Business Review about how personalized gifts actually help strengthen relationships—they carry more emotional weight because they show effort and intention. Which makes sense, right? It’s not just a jar—it’s their jar.
Common Mistakes When Painting Mason Jars (and How to Avoid Them)
Avoiding Paint Peeling
One of the biggest headaches when painting mason jars? Paint peeling off later on. It’s super frustrating, especially after all that work. Usually, it happens because the jar’s surface wasn’t cleaned properly, and oils or dust get in the way of the paint sticking.
Here’s the deal: mason jars often get handled a lot before you even start painting—think fingerprints or packaging residue—and that stuff makes it tough for the paint to cling.
So, how do you avoid this?
- Clean, clean, clean. After washing with soap and water, grab some rubbing alcohol or vinegar on a cloth and wipe down the jar. This really gets rid of any sneaky grease or leftover grime.
- Prime it. Especially if you want your paint to last, using a primer made for glass can be a game-changer. Spray primers or bonding primers help the paint stick better and keep it from peeling off later.
- Dry completely. Even a tiny bit of moisture can mess things up. So give your jars plenty of time to air dry or gently wipe them down before painting.
It’s a bit of extra work upfront, but trust me, it pays off when your jars stay looking good for ages.
Here’s another handy tip: before you even start painting, try giving your jar a quick, light sanding. It might sound a bit extra, but this little step really helps the paint stick better—especially if your mason jar has any texture or rough spots. It’s a simple way to set yourself up for a smoother, more polished finish.
Preventing Streaky, Uneven Paint
Painting mason jars can be a bit tricky, especially when those streaks or uneven spots show up. Since glass is so smooth, any thick patches of paint really jump out—and that’s super frustrating when you want a clean, flawless finish.
What usually causes this? Most of the time, it’s because too much paint goes on at once. Thick layers just don’t dry evenly, which leads to those annoying streaks and patches.
Here’s what I do to avoid it:
- Go thin and steady. Instead of slapping on a bunch of paint at once, put on thin, even coats. Let each layer dry completely before adding another. It might take a bit longer, but it’s worth it for that smooth look.
- Give it time. Waiting at least half an hour between coats really helps the paint settle and stick better.
- Use a foam brush. These are great because they don’t leave behind brush strokes like regular brushes do, so your jar ends up looking sleek and polished.
A little patience here makes a huge difference in the final result.
Pro tip: If you’re still seeing streaks even after going easy with thin layers, don’t worry—there’s a simple fix. Just grab some fine-grit sandpaper and gently sand the jar between coats. It helps smooth out any bumps or imperfections, giving your paint that nice, flawless finish you’re aiming for.
Sealing Your Painted Mason Jars for Longevity
Painting mason jars looks great at first, but honestly, over time, things like moisture, sunlight, or just everyday use can cause the paint to wear off. So, sealing your jars is kind of a must if you want them to keep looking nice for a while.
Basically, without a good seal, the paint can start to chip or fade—especially if you’re using the jars for fresh flowers or they’re hanging around the kitchen where they get touched a lot.
So, what should you do?
- Seal it right. Once your paint is totally dry, go ahead and apply a clear sealer. You can pick matte if you want something understated, or gloss if you’re after that shiny, polished vibe.
- Keep it fresh. If your jars see a lot of action or get wet often, don’t forget to reapply the sealer every few months. It’s an easy way to keep that paint looking sharp and protected.
Pro Tip: For added durability, use a spray sealer rather than a brush-on sealer to avoid disturbing the paint beneath. Spray in light, even coats.
How to Style Your Painted Mason Jars in Any Room
Painted Mason Jars as Centerpieces
Why they work so well? Mason jars come in all sorts of shapes, sizes, and colors, which makes them perfect for mixing and matching. Play around with different heights and fill them with seasonal goodies to create a look that really fits your space.
Here’s how to style them like a pro:
- Mix up the heights. Using jars of varying sizes adds depth and keeps things interesting. You can group them together in a cluster or line them up to lead the eye across the table.
- Fill them seasonally. In spring, fresh flowers or realistic faux blooms work great. For winter holidays, think pinecones, twinkling fairy lights, or little ornaments to bring that cozy festive vibe.
Pro Tip: Add a bit of texture by wrapping twine or lace around the jar’s neck, or add a small decorative element like a ribbon or a tag for extra personality.
Painted Mason Jars for Kitchen Organization
Whether you’re setting up a spice rack or a utensil holder, these jars can be painted to match your kitchen’s color palette and instantly elevate your storage game.
Why this works so well is pretty simple: mason jars are tough, easy to label, and just the right size for lots of kitchen needs. Their versatility means you can get creative and use them in all kinds of ways.
Here’s a few ideas to get you started:
- Spice Jars: Painting jars in soft, neutral colors and adding chalkboard paint labels gives your kitchen a cozy, rustic feel—plus, it keeps all your spices neat and easy to find.
- Utensil Holders: Bigger jars are perfect for corralling spatulas, whisks, and wooden spoons. Placing them right by the stove or on the counter makes cooking way more convenient.
- Dry Goods Storage: Got pasta, rice, or baking essentials like flour and sugar? Paint those jars, add a stencil or printed label, and suddenly your pantry looks organized and chic.
Pro Tip: If you prefer a more sleek, modern look, opt for metallic paints or darker shades like matte black or navy. These colors blend well with contemporary kitchens.
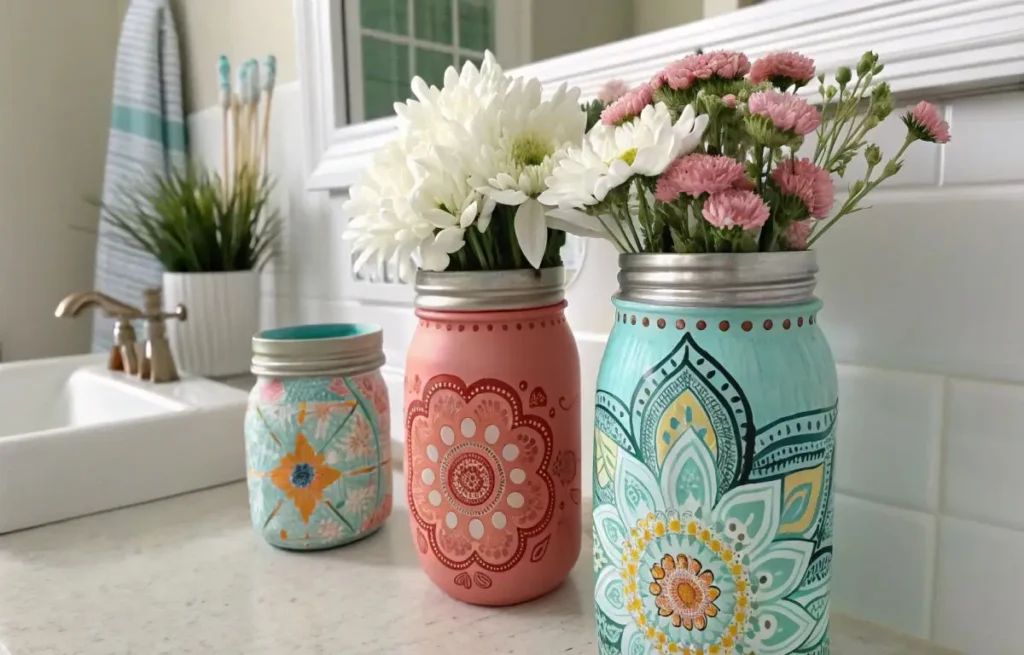
Bathroom Storage with Painted Mason Jars
Bathrooms are usually pretty small, right? So it’s nice when decorations can actually do something useful too. Painted mason jars are great for this—they can hold cotton balls, makeup brushes, or little toiletries, and they add a bit of color and charm without taking up much space.
They work well because mason jars bring that kind of cozy, vintage vibe that fits a bunch of different bathroom styles. Whether you like things simple or a bit more shabby chic, they blend right in.
Here are some easy ideas to try:
- For cotton balls and Q-tips, paint jars in soft colors like mint or lavender. Wrapping some twine or lace around the top makes them look cute and a little fancy.
- Makeup brushes? Use metallic paints like gold or silver to give the jars a bit of sparkle. They look nice on the counter and keep everything handy.
- Small stuff like hair ties or nail polish? Smaller jars are perfect for those. You can group a few together on a tray to keep things tidy and pretty.
Honestly, it’s surprising how just a few painted jars can make your bathroom feel more put-together and stylish without much effort.
Quick tip: If you want to take things up a notch, try using glass paint or a frosted spray on your jars. It gives them this soft, elegant look that’s way nicer than plain paint. Also, if you want to keep stuff like cotton balls or makeup pads fresh and dust-free, adding a snug lid to the jar can be super handy.
Conclusion
Painting mason jars isn’t just some simple craft — it’s a way to add a bit of personality and purpose to your home without spending a ton. If you follow these steps and tips, you’ll end up with pieces that look great and mean something personal. Whether it’s for a holiday, getting your space organized, or making gifts that actually feel special, these jars are the kind of DIY you’ll come back to again and again.
People Also Read
Tissue Paper Flowers That Speak Love Silently
Galaxy Jar Decoration: Stunning Celestial Magic
Homemade Bath Salts Recipes: Benefits & DIY Guide
FAQs
1. How do you prepare mason jars before painting?
Clean the jars with soap and water, then wipe them down with rubbing alcohol to remove any grease or residue. This ensures the paint adheres properly.
2. Can you paint mason jars without sanding them?
Yes, but sanding lightly can help the paint adhere better, especially if the jars have a glossy finish.
3. What paint is best for mason jars?
Use acrylic paint or spray paint specifically designed for glass to ensure smooth coverage and durability.
4. How long does painted mason jar paint take to dry?
It typically takes about 30 minutes to an hour for each coat to dry, but let the jars cure for 24-48 hours for the best results.
5. How do you seal painted mason jars?
Apply a clear acrylic sealer or spray sealer to protect the paint from chips and fading. Reapply as needed for long-lasting durability.