
Summer’s finally here, and there’s something about this season that makes me want to brighten up every corner of the house, starting with the front door. It’s such an easy place to make a statement. One project I always come back to this time of year is making wreaths. They’re fun, simple, and instantly welcoming.
Lately, I’ve been mixing things up a bit. I still love the look of real flowers and classic grapevine bases, but this time I tried something a little different, a straw hat wreath. It’s playful, summery, and just the right kind of unexpected. I’ll walk you through how I made it, in case you’re ready to give your door a cheerful update too.
What You’ll Need For Your Straw Hat Wreath
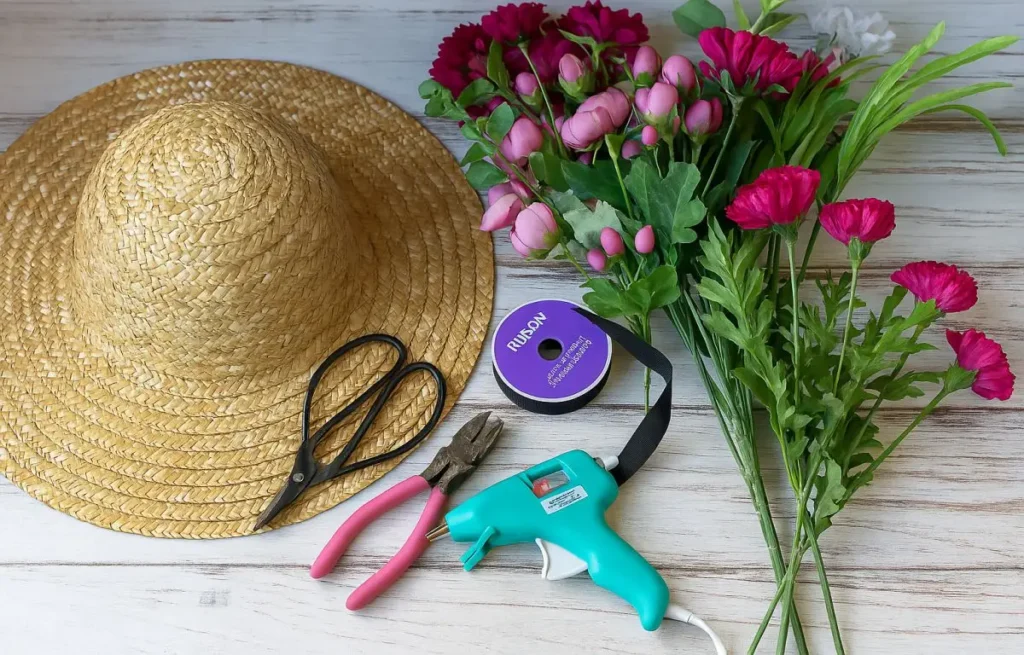
You can easily find budget-friendly straw hats at craft stores, and even at dollar stores. Or, you might already have an old one at home ready for a new purpose. Once you’ve got your hat, all you’ll need are some faux flowers, ribbon, and a hot glue gun to get started.
Hanging Your Straw Hat On The Door
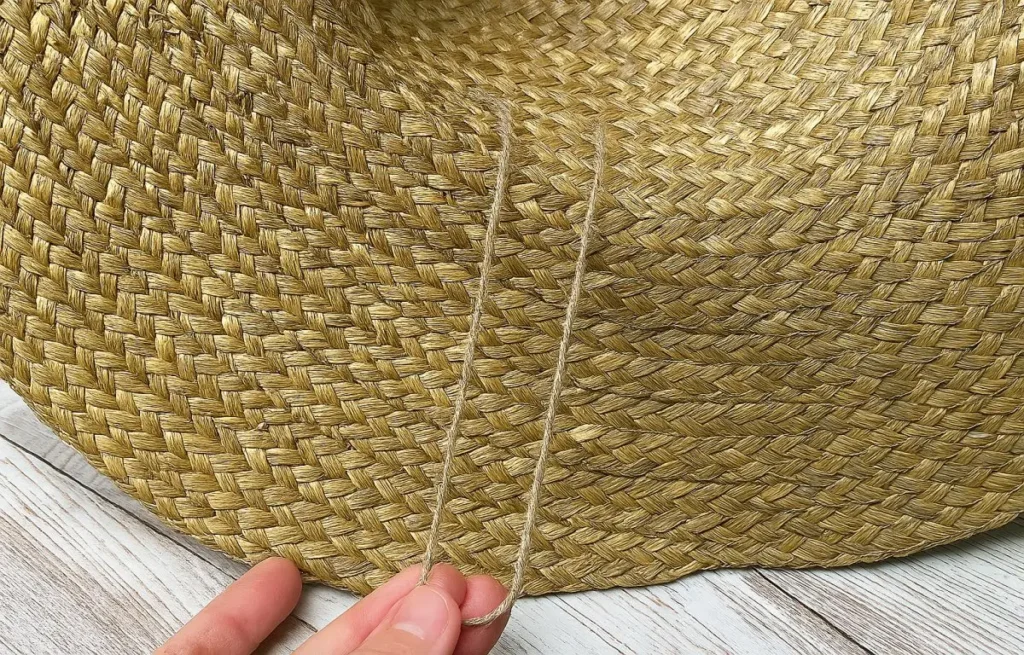
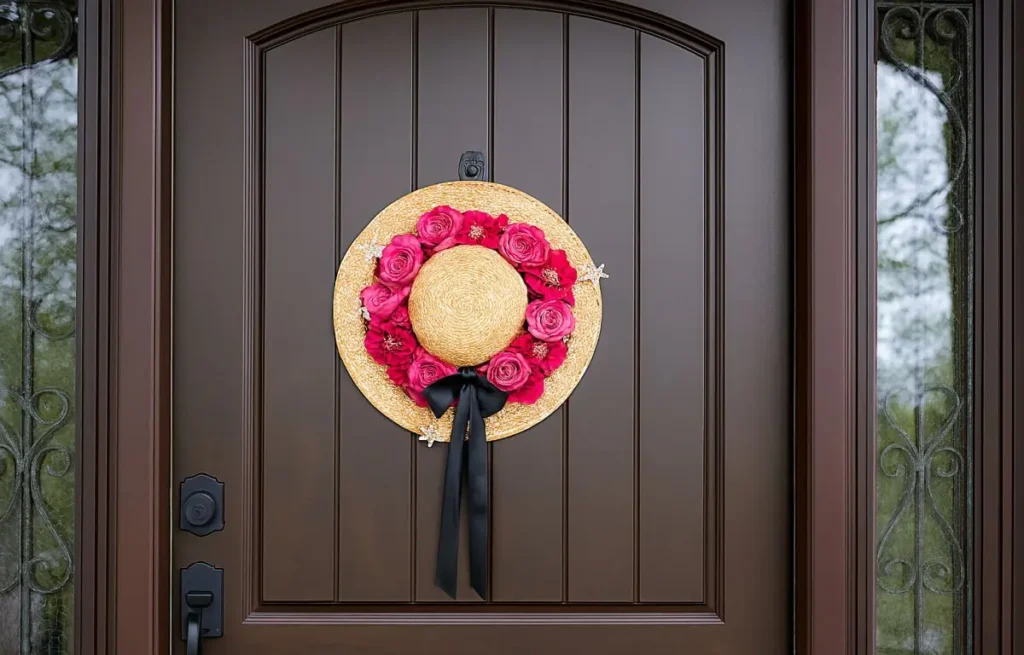
To hang your straw hat wreath, you’ll want a simple, sturdy solution, and twine works perfectly. I just threaded a piece of it through one of the small openings in the hat (there’s usually a spot near the crown that works well). Play around with the length until the wreath hangs where you want it on the door.
Once you’ve got the height right, tie a secure knot and gently pull it through so the knot tucks inside the hat. It stays hidden, keeps the front looking neat, and the whole thing hangs beautifully, no fancy hardware needed.
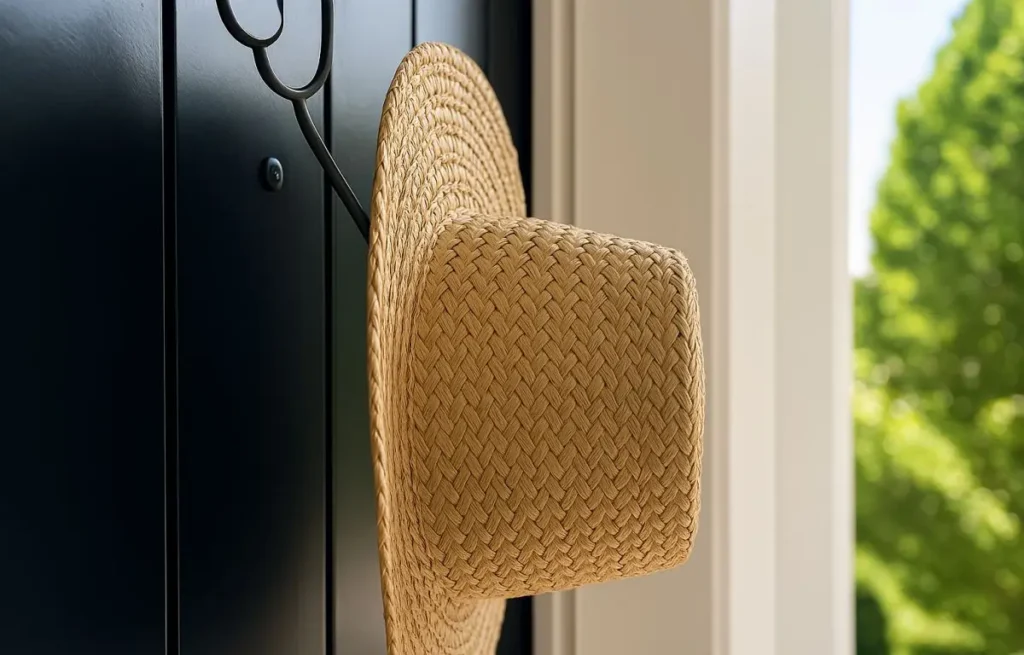
After that, just slip the twine over your wreath hook from underneath the hat. It’s a small detail, but it makes a big difference, the hanger stays completely hidden, so all you see is the charming straw hat wreath front and center. Clean, simple, and no distractions.
How to Decorate Your Straw Hat Wreath

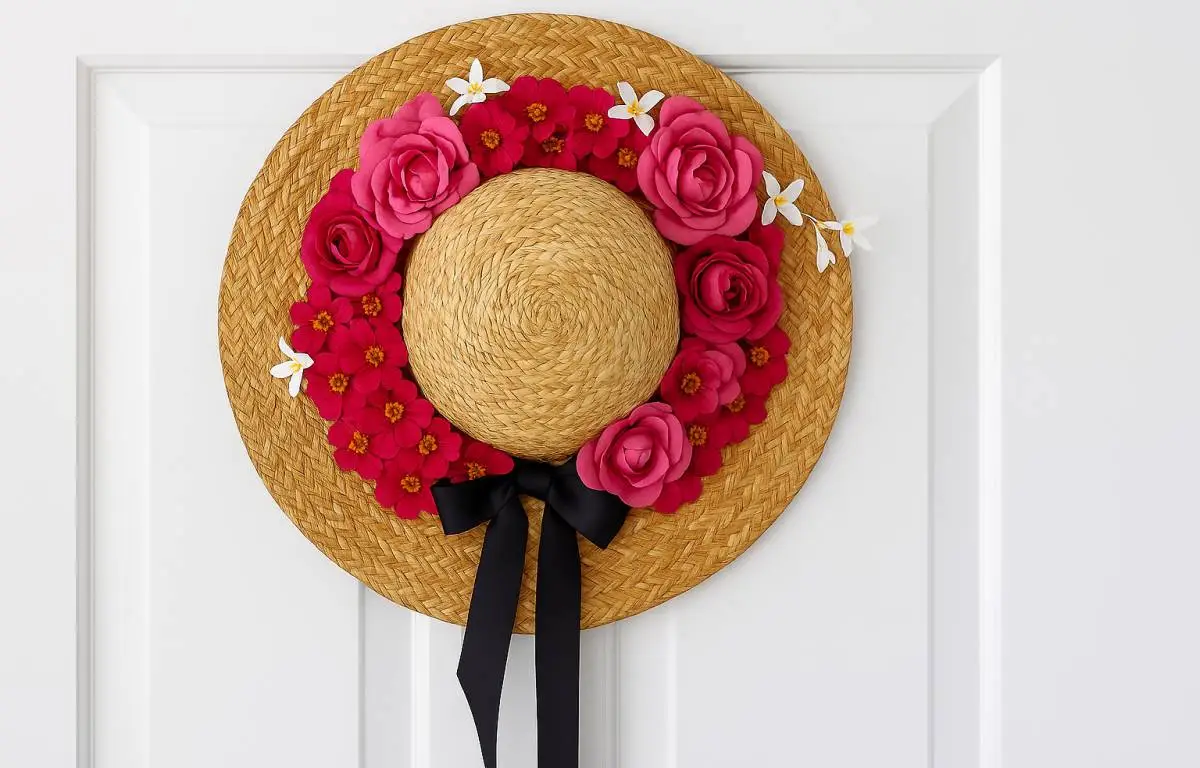
Now comes the fun part, adding the decorations! I chose vibrant raspberry pink flowers to give this summer wreath a festive, cheerful look. To add some contrast and keep things light, I included a bunch of small white daisies as well, all picked up from the craft store.
Start by using wire cutters to trim the flower heads from the stems. For the daisies, cut them into 3 to 4-inch pieces to make them easier to arrange. Don’t toss the leftover materials like leaves or buds, you might want to tuck a few of them in with the flowers for extra texture and fullness. A little greenery can go a long way in making your design pop.
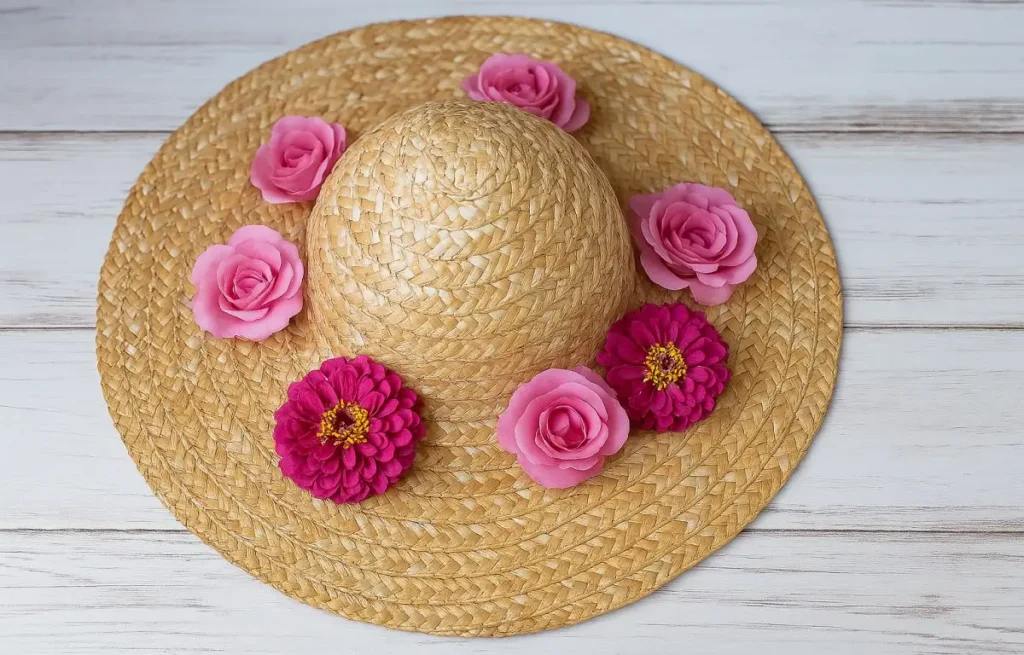
It’s best to start with the largest blooms first. Add a dab of hot glue to the base of each flower and press it firmly onto the brim of the hat.
Once the big pieces are in place, begin filling in the gaps with smaller flowers and buds. Be sure to leave a small bare spot opposite the hanger—this is where your bow will go.
Wrap up the design by tucking in the white daisies and any greenery you’d like to include. These final touches help blend everything together and give your wreath a polished, full look.
How to Add a Bow

It’s time to add the finishing touch, a bow.
Cut a ribbon about 20 inches long and fold it in half so the ends hang down just a bit. Then, gently pull the two sides apart to form a soft, open loop. Add a small dab of hot glue right at the center fold, and press it onto the bare spot you left earlier on the hat brim. That little ribbon detail adds just the right touch of charm to finish off your straw hat wreath perfectly.

Next, take a shorter piece of ribbon—around 8 inches long with shorter tails—and tie a smaller bow. This one will sit right on top of the bigger loop you just glued.
Add a little dab of hot glue to the back of the small bow, then press it carefully in the center of the larger ribbon. Just like that, your straw hat summer wreath is finished and ready to add a cheerful touch to your door!
There’s something about the natural, beachy feel of a straw hat paired with bright raspberry reds and soft pinks that just screams summer. It’s like capturing a little bit of sunshine right on your door. This easy project will keep your space feeling fresh and cheerful for months, and when fall rolls around, it’s the perfect excuse to start brainstorming your next seasonal wreath.
People Also Read
Summer Flip Flop for Girls: Easy DIY Project At Home
Paper Flowers Folding Tricks You’ll Wish You Knew Sooner
Tissue Paper Flowers That Speak Love Silently
FAQs
1. Can you make a wreath from a straw hat?
Yes, a straw hat can be easily transformed into a charming summer wreath with flowers and ribbon.
2. What materials do I need to make a straw hat wreath?
You’ll need a straw hat, artificial flowers, ribbon, a hot glue gun, and some twine or string for hanging.
3. How do you hang a wreath made from a straw hat?
Use twine threaded through the hat’s holes and hang it on a wreath hook on your door.
4. Can I use real flowers on a straw hat wreath?
You can, but artificial flowers last longer and withstand outdoor conditions better.
5. How long will a straw hat wreath last outside?
With artificial flowers, it can last several months through summer weather if kept in a shaded, protected spot.