
A DIY seashell mirror isn’t just some craft—it’s like bringing a slice of the beach right into your home. I tried making one last weekend, and let me tell you, it’s now the star of my living room. Whether you’re going for a small, cute accent or a big, bold showstopper, those seashells scream coastal charm. This guide’s got everything you need—supplies, steps, even some fancy tricks to make your mirror pop. Ready to turn a plain mirror into something that feels like a seaside getaway? Let’s dive in, even if my glue gun skills are still a bit shaky!
Materials Needed for Your DIY Seashell Mirror
Essential Supplies for a Seashell Mirror Project
To create a seashell mirror, you’ll need a few key materials to get started. Here’s a breakdown of what you’ll need:
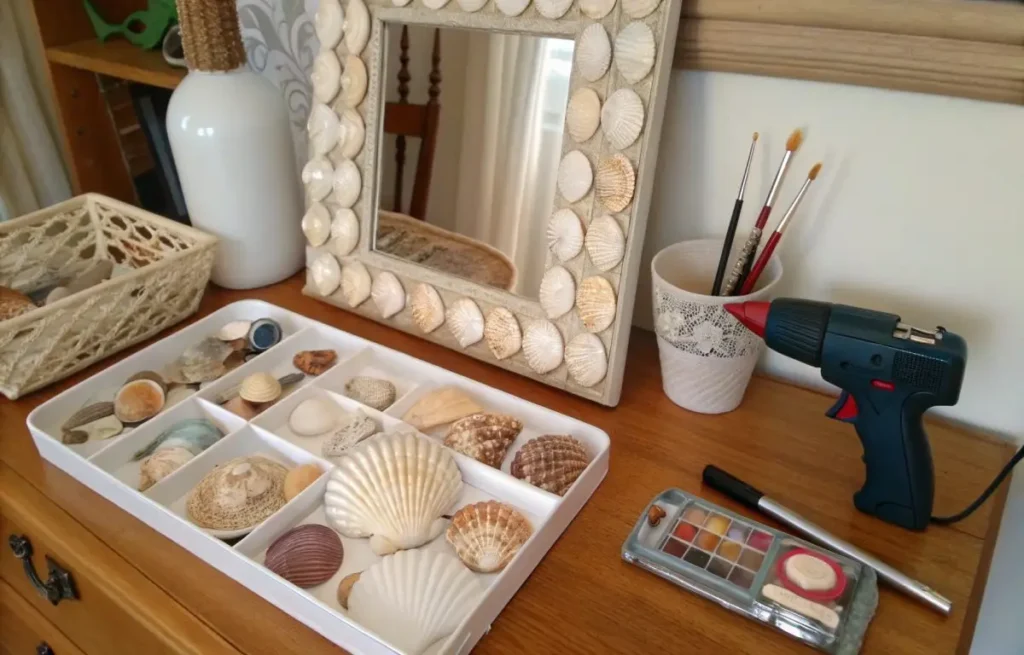
- Mirror base: Grab a round or square mirror frame, whatever vibes with your style. Craft stores have ‘em, or dig out an old mirror from your attic like I did.
- Seashells: Pick shells in all sorts of shapes—big conchs or cowries for bold pops, tiny scallops or clams for cute details. My beach haul was a total mess, but it worked.
- Hot glue gun and glue sticks: For sticking those shells on tight. I burned my finger once, so, uh, watch out with that glue gun.
- Acrylic paint: Splash on some white, turquoise, or sandy beige to jazz up the frame or shells. I went overboard with turquoise and kinda love it.
- Jewels, stones, or crystals (optional): Toss in some sparkly gems for extra pizzazz. They catch the light like magic—my niece insisted on adding way too many.
Types of Seashells to Use
Not all seashells are created equal when it comes to DIY projects. Here’s a breakdown of different types of seashells that will add variety and texture to your seashell mirror:
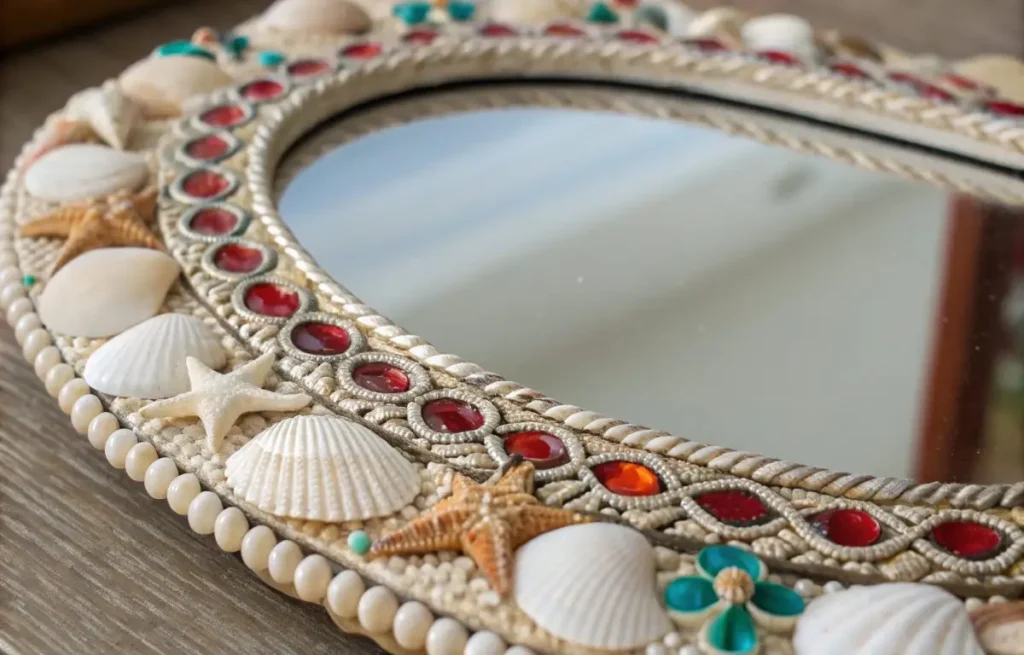
- Conch shells: Big, swirly conchs are total show-offs, perfect for a bold, in-your-face look. I stuck one on my mirror, and it’s like the king of the frame.
- Scallop shells: These fluted guys add fancy texture along the edges. I tried jamming too many on once, and it looked like a mermaid’s yard sale.
- Clam shells: Small, smooth, and usually whitish, they’re great for little accent pops. I love how they sneak in without stealing the spotlight.
- Cockle shells: Their fan shapes and bright colors are awesome for layering between big shells. My niece grabbed all the pink ones, so mine’s a bit lopsided now.
If you’re into keeping things green, try grabbing seashells from a beach walk or eco-conscious vendors. I went beachcombing last summer and found some awesome shells, though I did end up with sand in my shoes for days. You can also find online shops with ethically sourced shells, which is great if you want to avoid harming the ocean vibes. It’s a small step, but it makes your mirror project feel good in more ways than one.
Crafting Your DIY Seashell Mirror: Step-by-Step Guide
Step 1: Prepare Your Mirror Frame
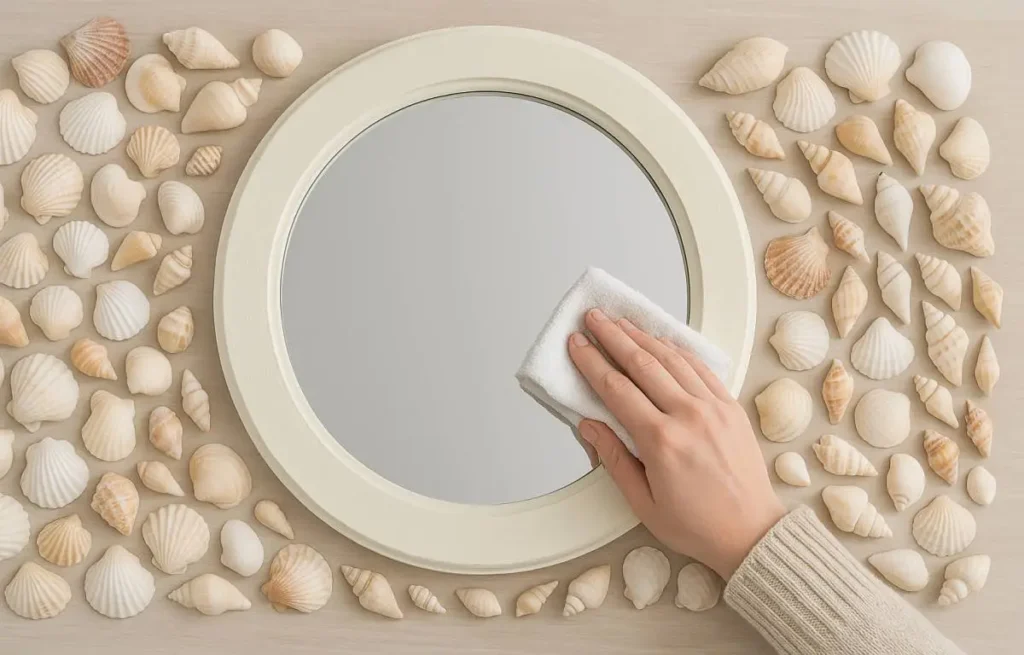
Kicking off your seashell mirror starts with picking the right base. Go for a round frame if you’re feeling that classic beachy vibe, or try a square or funky asymmetrical one for something more modern and artsy. I nabbed an old mirror from a thrift shop and slapped some paint on the frame to save a buck—worked like a charm. Before you start gluing shells, give the frame a good scrub to make sure the glue sticks tight. I skipped this once, and half my shells fell off mid-craft. Total bummer, so don’t be lazy like I was!
Step 2: Plan Your Design
Before you start gluing, take a minute to play around with your shells on the frame. I dumped my whole beach collection out last night and just messed with layouts ‘til something clicked. Mix big shells with little ones for a layered vibe that’s got some depth—looks way cooler that way. You can space ‘em out all neat and even for a tidy, symmetrical design, or scatter them all wild for that carefree, just-walked-off-the-beach feel. My first attempt was a bit of a mess, but honestly, it still looked kinda artsy. Find what feels right for you!
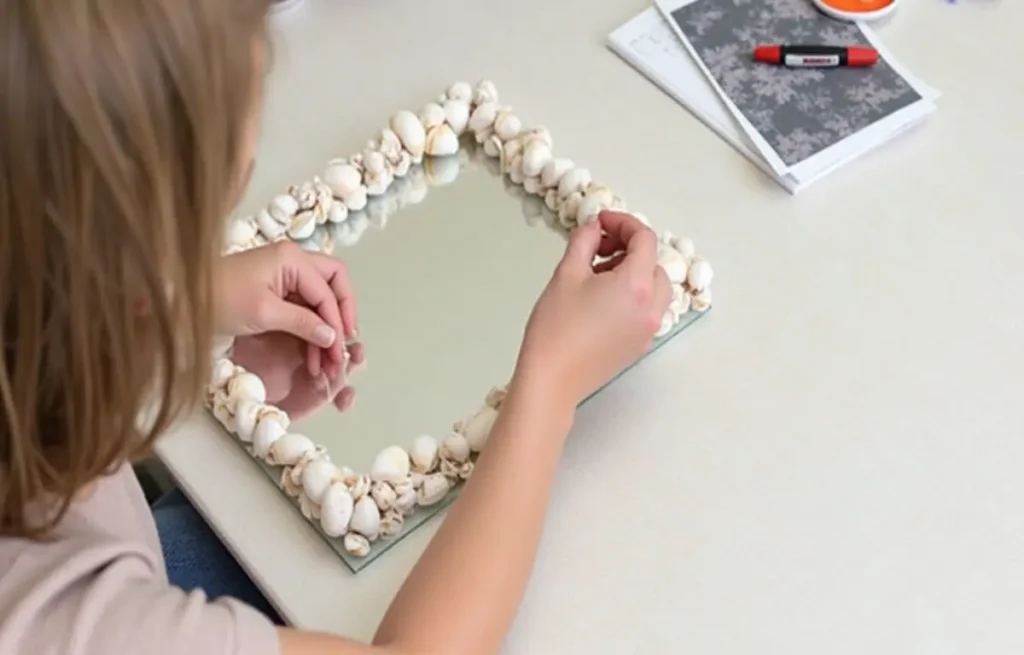
Step 3: Gluing the Shells
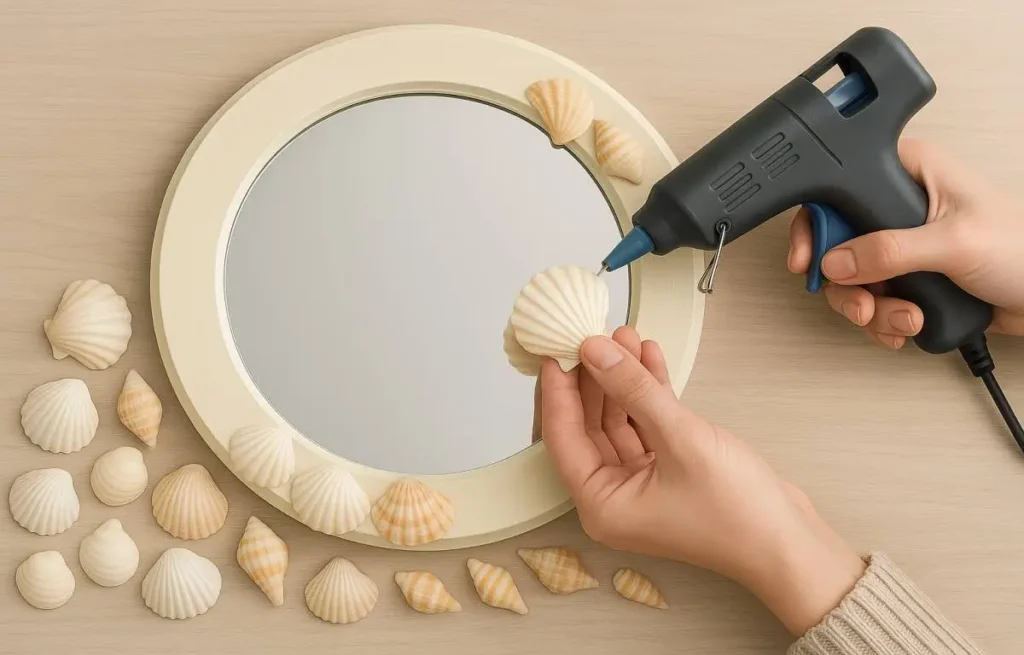
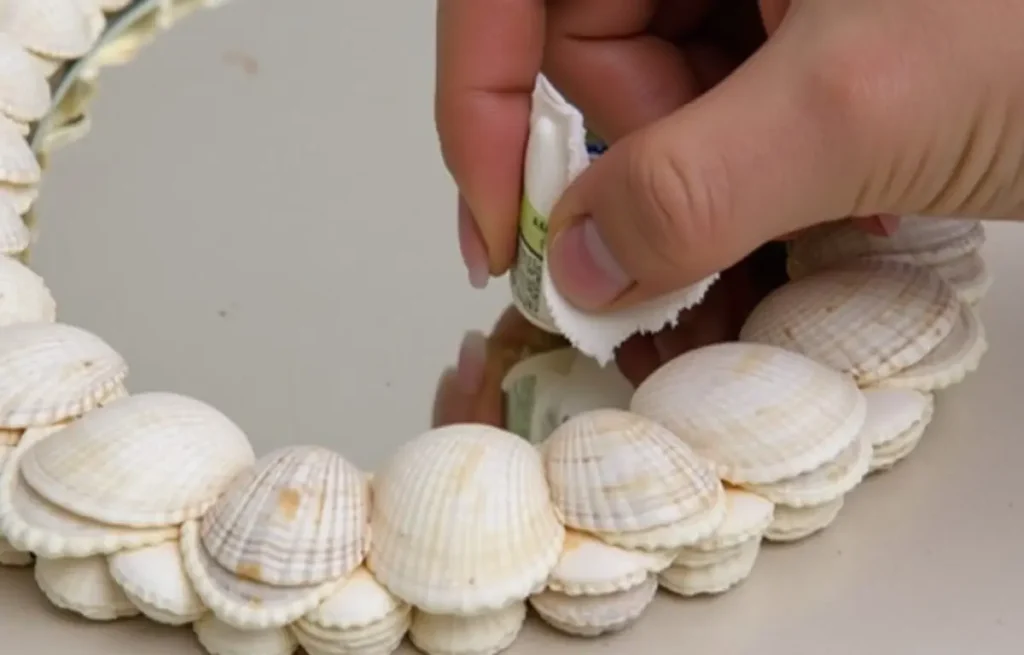
Once you’ve got a layout you love, it’s time to glue those shells onto the mirror frame. Start with the big ones and work down to the tiny guys, using a hot glue gun to lock each shell in place. Pro tip: dab the glue on the shell, not the frame, unless you want a drippy mess—I learned that after a glue blob ruined my first try. Take it slow to keep it neat, and soon your mirror’s gonna look like a beachy masterpiece, even if your fingers are a bit sticky.
Step 4: Adding Decorative Touches
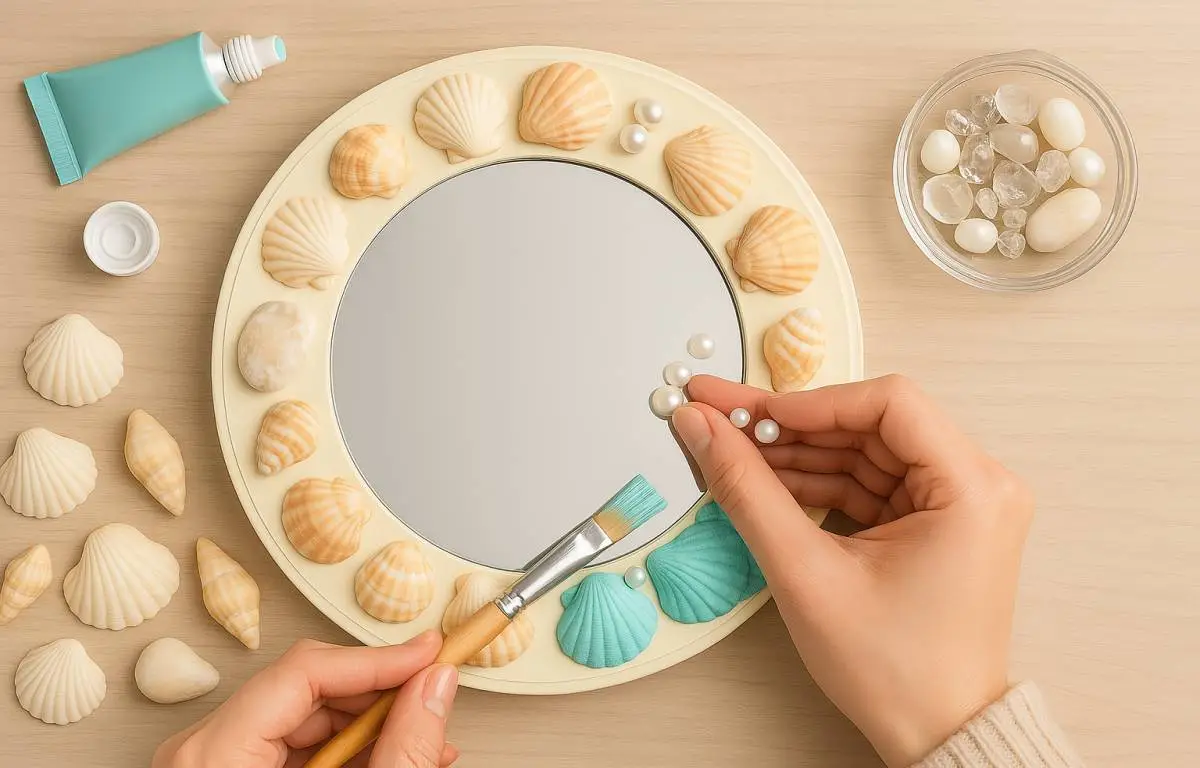
With all your shells glued on, it’s time to jazz things up a bit. I went a little wild last night tossing on some tiny stones and fake pearls between the shells—gives it this sparkly, beach-treasure vibe. You can even add crystals for extra bling if you’re feeling fancy. A quick swipe of acrylic paint on the shells or frame really pulls that coastal look together; I tried turquoise and ended up with a total mermaid glow. My mirror’s not perfect, but those little touches make it feel like it washed up from the ocean in the best way.
Step 5: Let It Dry
Give your mirror a few hours to dry so the glue sets solid—I got impatient once and knocked a shell off, total rookie move. Once it’s ready, hang it up wherever you want that beachy vibe to shine. Just go easy when you handle it; those shells are delicate, and I learned the hard way after bumping one and losing a scallop. Treat it like the coastal treasure it is, and it’ll look amazing on your wall, even if it’s got a few quirky imperfections like mine.
Advanced Design Techniques for Your DIY Seashell Mirror
Layering Seashells for Depth and Texture
To make your seashell mirror really pop, it’s all about layering different shells for that wow factor. I started with big, flat shells as the base last night, then piled on smaller ones and some delicate coral bits—total game-changer. It gives the mirror this cool, 3D vibe that feels alive, like it washed up from the sea. Mess around with the layers to add depth and a bit of flowy movement. My first try was a little crowded, but honestly, it still looked like a beachy dream.
Design Patterns and Themes for Your Mirror
Customize your seashell mirror with unique design themes that reflect your style and home decor:
- Boho beach style: Mix seashells with driftwood and hemp rope for a cozy, bohemian vibe packed with texture. I tried this and ended up with gluey fingers and a mirror that screams beach wanderer—love it.
- Tropical theme: Grab bright, colorful shells and toss in some fake tropical plants. It’s like a mini island getaway. My niece went wild with neon shells, and it’s a bit much but so fun.
- Rustic coastal: Go for muted shells and a distressed frame for that weathered beach house look. I distressed mine too much once, and it’s more “shipwreck” than rustic, but still cool.
Customization Tips Based on Space
- Bathroom: If you plan to place your mirror in the bathroom, ensure that you use a more water-resistant sealant and select shells that can withstand humidity. Stick to simpler designs with fewer layers.
- Living Room: For a living room or hallway, you can go big with a dramatic seashell mirror that becomes the focal point of the room. Incorporate a mix of larger shells for a grand appearance.
Troubleshooting Common Seashell Mirror Problems
Dealing with Crooked Shells
It’s super annoying when a shell sticks all wonky or just won’t stay put. I’ve been there—glued a conch totally off-center once. No stress, though! Grab a heat gun and gently warm the glue to loosen it, then nudge the shell back where it belongs before it hardens again. Worked like a charm for me, even if I almost melted my fingers.
Fixing Uneven Glue Application
Glue blobs showing up on your shells or frame? Ugh, I hate that. I had a gluey mess ruin my first mirror’s vibe. Once it’s dry, take a craft knife and carefully scrape off the excess. It’s a bit fiddly, but it keeps things looking sharp and pro, even if your craft table looks like a glue bomb went off.
How to Care for Your DIY Seashell Mirror
Keeping Your Seashell Mirror Pretty
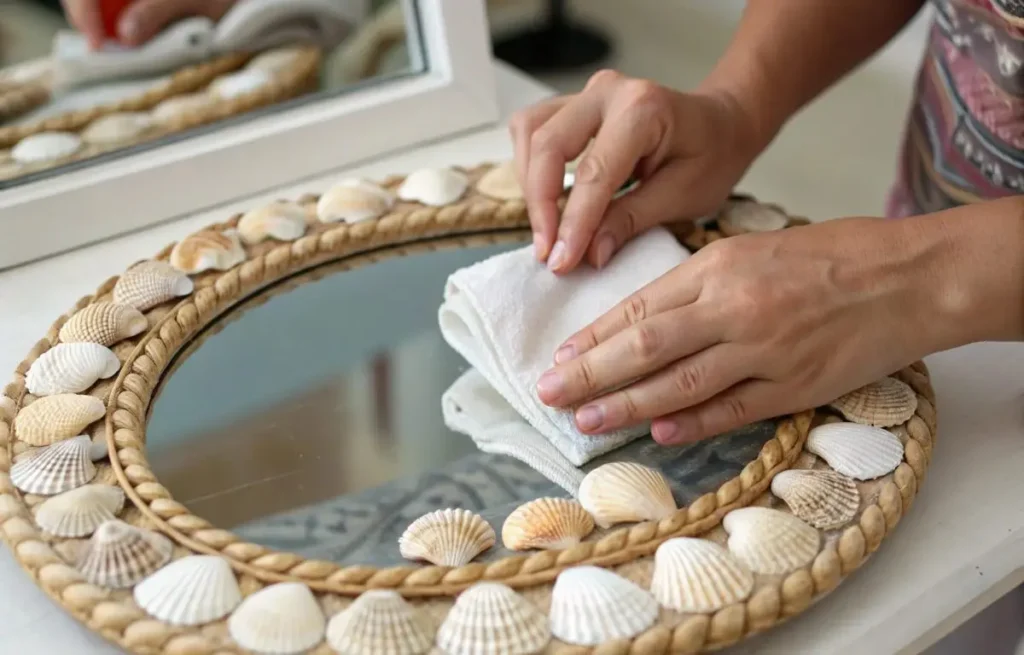
To keep your seashell mirror looking fresh, a little TLC goes a long way. Grab a soft microfiber cloth to wipe the mirror gently—trust me, you don’t want to knock off a shell like I did once. For the shells, skip harsh cleaners that might mess up their color; a bit of mild soap and warm water does the trick just fine.
Protecting Your Mirror from Damage
To make sure your mirror stays gorgeous, don’t hang it somewhere humid or in direct sun—my first one got a bit faded from a sunny spot, oops. A quick coat of sealant keeps dust and dirt off the shells and frame. It’s a small step, but it saves your beachy vibe from looking like a shipwreck over time.
Conclusion: Your Perfect Coastal Mirror
Making a DIY seashell mirror is like bottling up a bit of the beach for your home. Whether it’s a cute little bathroom accent or a big, bold living room piece, those shells let you get super creative. I made one last week, and even with my slightly crooked shells, it’s got this ocean magic that makes me smile. With this guide, you’ve got all you need to craft a mirror that’s totally you—a little piece of seaside serenity, even if it’s not perfect. Dive in and enjoy the process!
People Also Read
Upcycling Trash into Treasure: Creative DIY Projects
FAQs
1. How do I start crafting a DIY seashell mirror?
Begin by gathering your materials: a mirror, seashells, glue, and a base to attach the shells. Then, arrange the shells around the mirror’s frame before gluing them in place.
2. What type of glue is best for a DIY seashell mirror?
Use a strong, clear-drying adhesive like hot glue or epoxy resin to ensure the shells stay securely in place.
3. Can I use any seashells for my mirror project?
Yes, you can use any seashells you like, but ensure they are sturdy enough for the mirror frame and will adhere properly to the surface.
4. How do I prevent the seashells from falling off?
Make sure to apply enough glue to each shell and allow ample drying time. Using a high-strength adhesive will help secure them for the long term.
5. How can I clean my DIY seashell mirror?
Wipe the mirror frame gently with a soft, damp cloth. Avoid harsh chemicals to protect the shells and maintain the mirror’s appearance.