
I’ve always loved watching kids get lost in a craft project—it’s like their little brains light up with ideas. Making animal masks is such a blast, and it’s not just about the fun. It helps them get better at using their hands and lets their imaginations run wild. Whether it’s for a school thing, a lazy Saturday, or a birthday party with an animal theme, these masks keep kids busy and happy. I tried this with my niece once, and she was so proud of her lopsided lion mask. Here’s a quick guide to making playful masks your kids will go nuts for—they might even wear them all day!
Step-by-Step Guide to Crafting Animal Masks for Kids
There’s something magical about seeing kids go wild making animal masks—it’s like they’re half artist, half zoo animal. But why stick to plain old masks? Tossing in some fun, personal twists can make the whole thing feel like a big adventure. I remember my nephew insisting on adding glitter to his tiger mask, and it was a mess, but he was over the moon. Here’s how to take your mask-making to the next level, so your kids have a blast and maybe make a memory or two.
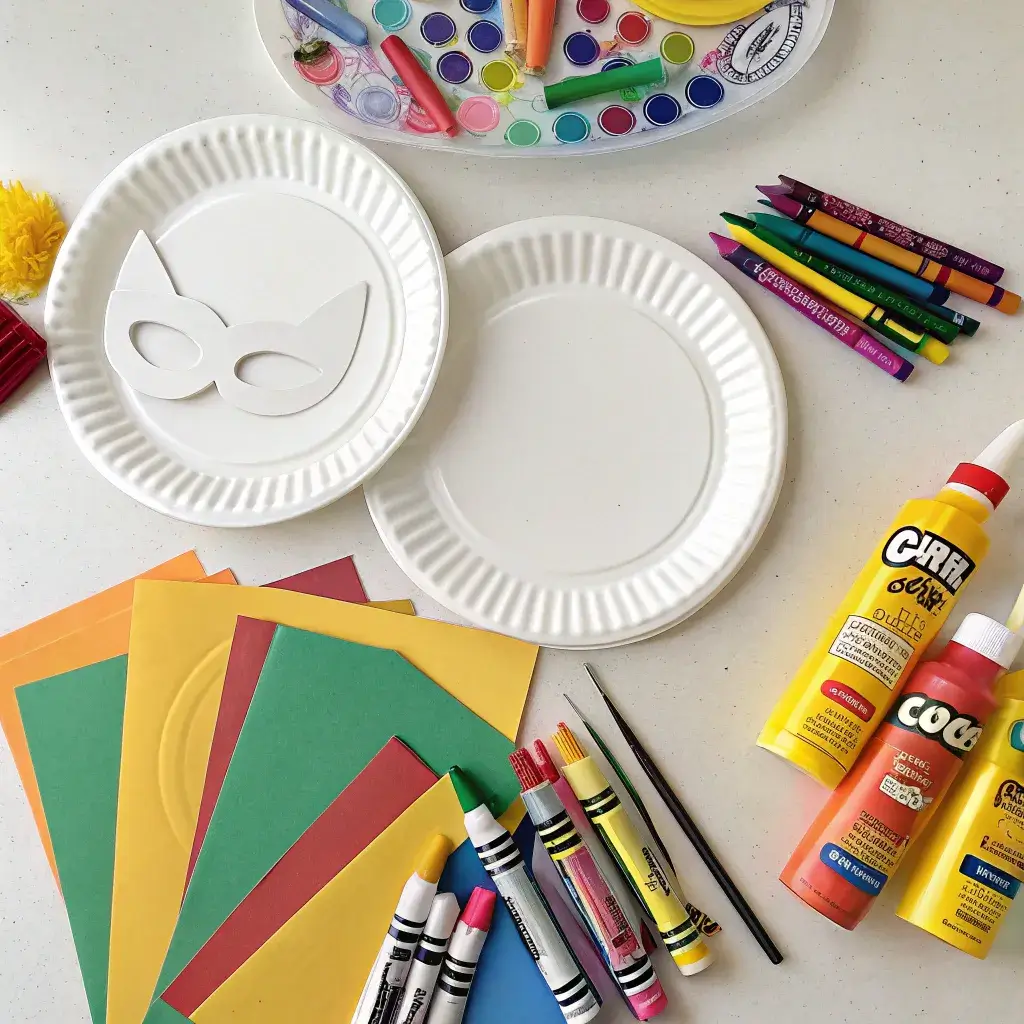
Materials You’ll Need:
While the materials can vary based on the type of animal mask, here’s a comprehensive list of what you’ll likely need to get started:
- Paper plates or cardboard: These work great as a solid base. I like paper plates because they’re so easy to handle, especially for younger kids.
- Markers, crayons, or paint: Perfect for splashing on some color. My kid cousin mixed crayons and paint once, and the funky texture was honestly pretty cool.
- Scissors: You’ll need these to cut out eyes, noses, or whatever else your mask needs. Just be careful—kids and sharp stuff, you know?
- Glue or craft glue: Keeps all the pieces stuck together. I learned the hard way that cheap glue can make things fall apart mid-roar.
- Elastic string, ribbons, or headbands: These hold the mask on your kid’s face. Ribbons feel fancy, but elastic’s easier to deal with.
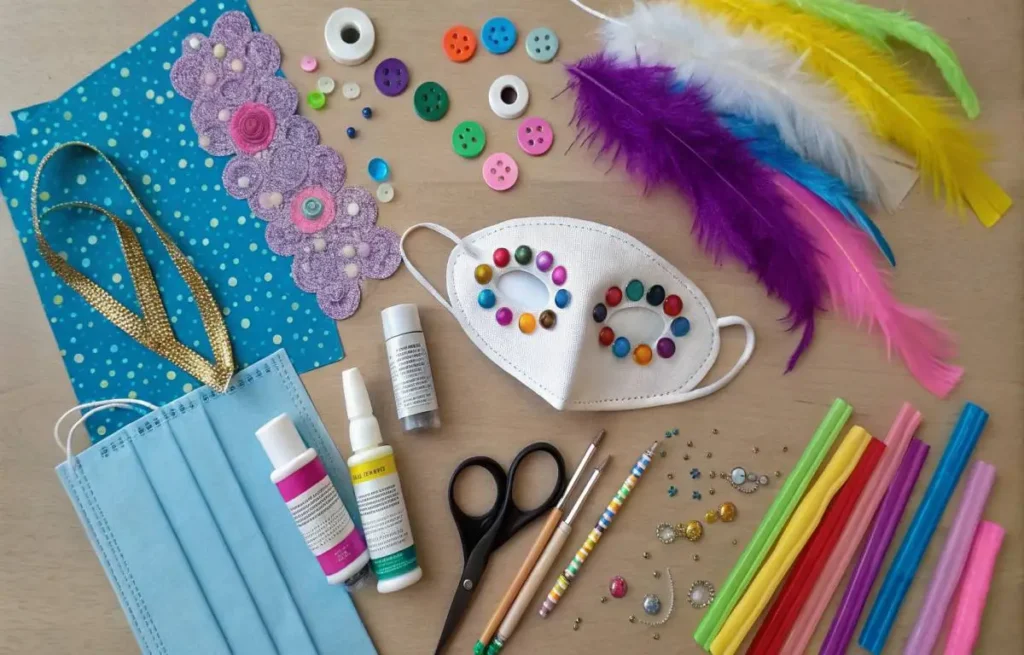
- Embellishments: Yarn, feathers, fabric bits, googly eyes, felt, or sequins—go wild to add some pizzazz and texture.
- Optional extras: Beads, buttons, or a sprinkle of glitter can make the mask pop. I’m not huge on glitter—it gets everywhere—but kids love it.
Step-by-Step Instructions to Create an Animal Mask:
1. Prepare the Mask Base
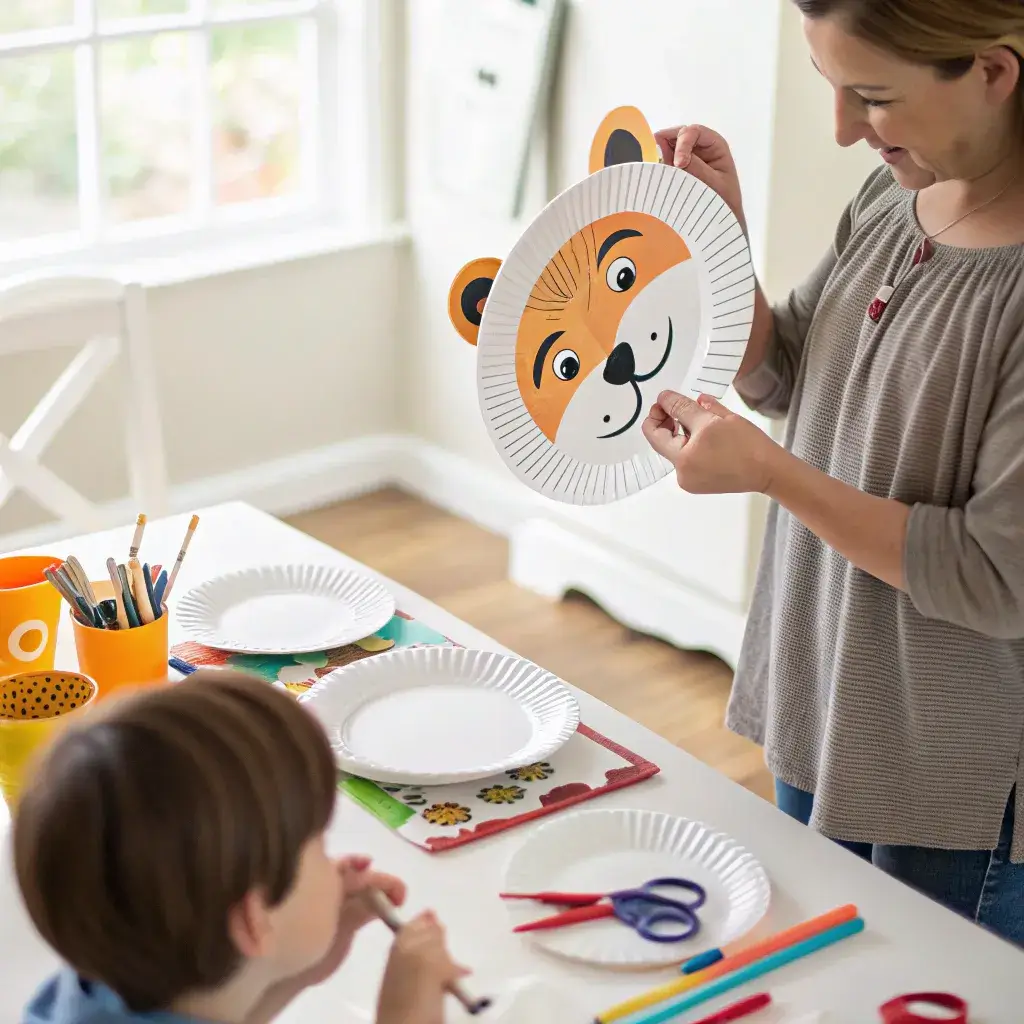
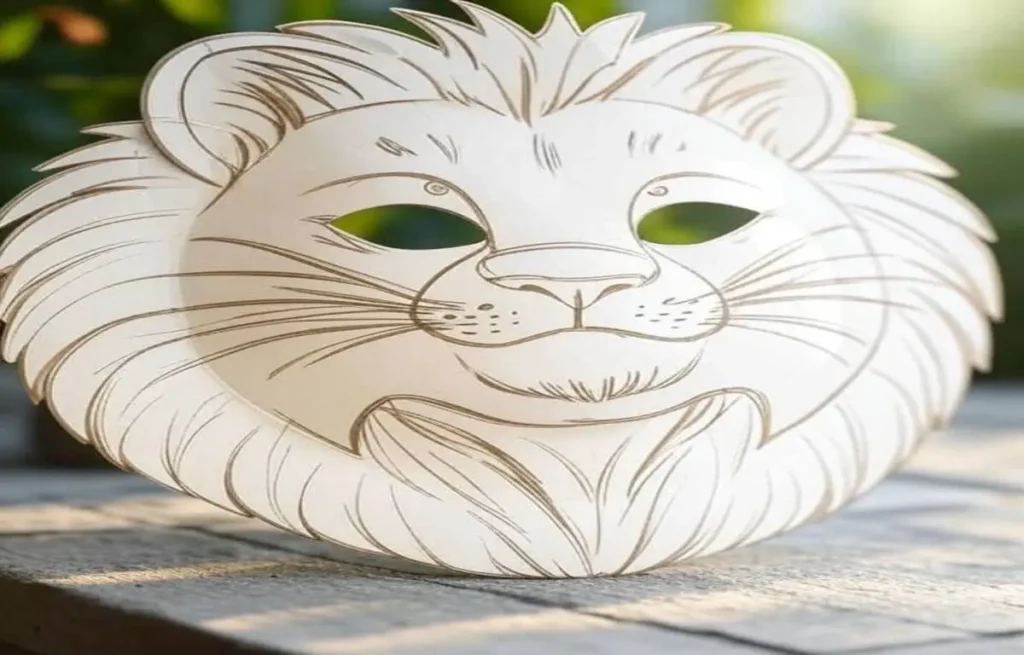
Alright, let’s kick things off by rounding up all your supplies and setting up a workspace. I usually spread out an old tablecloth because, trust me, things get messy fast. Grab a paper plate—or some cardboard if you want it extra sturdy—and set it down flat. Then, sit with your kid and ask what animal they’re dying to turn into. My nephew always picks a lion, but last time he switched to a panda, which was adorable. Lions or pandas are great starting points since they’re pretty easy, but don’t be afraid to let their wild ideas take over!
- Scribble the face: Grab a pencil and doodle the animal’s face on that paper plate. Think easy stuff—a lion’s scruffy mane or, I don’t know, a bunny’s round cheeks. My cousin’s kid made a frog once, and it was all lumpy and awesome.
- Sketch eye holes: Draw some eye holes so your kid isn’t stumbling around blind. Big enough to see, but not so big the mask’s just a floppy ring. I totally botched this once—looked like a raccoon with goggles.
- Cut carefully: Snip those eye holes out with scissors. Go slow, ‘cause rushing makes it look like a dog chewed it. Safety first, right?
- Throw in details: Add a nose or some ears, maybe a goofy mouth. Those little touches get kids all excited, like they’re actually turning into their animal.
2. Decorate the Base
Now, it’s time to add color and texture to the mask!
- Color it up: Grab some markers, crayons, or paint and go to town with colors—maybe sunny yellows and browns for a lion, or pinks and purples for a cat. My nephew’s panda mask was a smeary mess, but he loved it. Don’t sweat perfect lines; wonky’s more fun.
- Add texture: Glue on bits of fabric, felt, or tissue paper for extra flair. I tried yarn for a lion’s mane once, and it was gloriously fluffy, like a bad hair day. Stick on some fabric spots for a giraffe or tissue strips for pizzazz—it makes the mask feel alive.
3. Add Details and Features
This step allows for true creativity. It’s all about adding those details that make the animal come to life:
Eyes:
- Stick on googly eyes: Slap on some googly eyes for that wobbly, silly vibe that makes the animal pop. Big ones are perfect for cute owls or pandas—my niece’s panda mask looked like it was staring into my soul. Smaller ones give tigers a sneaky, fierce look.
- No googly eyes? No sweat: Cut circles from colored paper and scribble on them with markers. I tried layering smaller circles for eyelids once, and it was weirdly cool. Or add a bit of black string for pupils—sounds odd, but it gives the mask some quirky charm without fancy stuff.
Nose and Mouth:
- Nose: For a bear, glue on a little black felt or paper circle—looks super cute. A lion? Try a gold felt circle; my nephew’s lion mask was roaring with style. For bunnies, a pink triangle or oval is just perfect, like, adorably twitchy.
- Mouth: Keep it easy and draw the mouth right on the mask, or cut one from paper and stick it on. Feeling extra? Cut a separate mouth and attach it with a brad so your kid can make it flap open and shut. I did this for my cousin’s kid, and she went nuts playing with it all evening.
Ears:
- Basic ears: Ears make the mask scream “animal.” Cut out round ones for a lion or long, floppy ovals for a bunny from felt or paper, then glue ‘em on top. My niece’s bunny mask looked so cute it was almost unfair.
- 3D ears: Wanna go big? Cut two matching ear shapes, fold the bottoms, and glue those folds to the mask for ears that stick out. I tried this with a bear mask, and my nephew kept poking them ‘cause they felt so cool and bouncy.
Mane, Fur, and Texture:
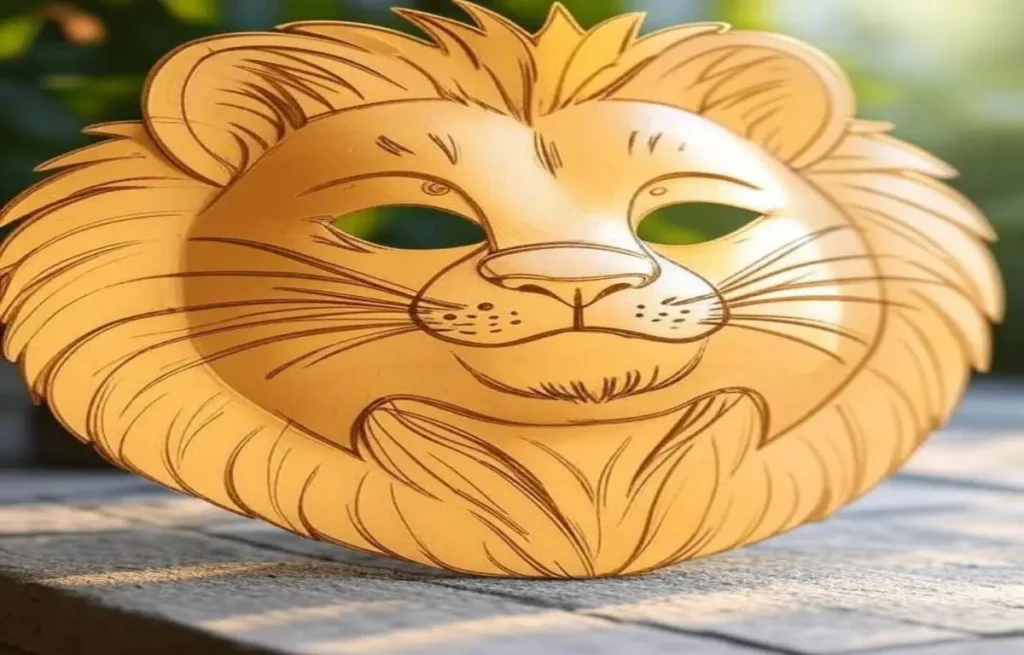
- Lion’s mane: For that big, wild lion look, snip yellow or orange paper strips—or use yarn if you want it cuddly. Glue ‘em around the mask’s edges for a mane that’s all roar. My nephew’s lion mask was so poofy it kept falling in his eyes, but he loved it.
- Animal fur: Cotton balls are magic for a soft, fuzzy vibe—great for bears or bunnies. Stick ‘em around the face for that touchy-feely charm. I tried this and ended up with cotton fluff everywhere, oops.
- Fabric bits: Dig out some fabric scraps for extra pizzazz. Cut ‘em into shapes—like felt giraffe spots or goofy dog polka dots—and glue ‘em on. It’s a quick way to make the mask pop with color and texture, no fuss.
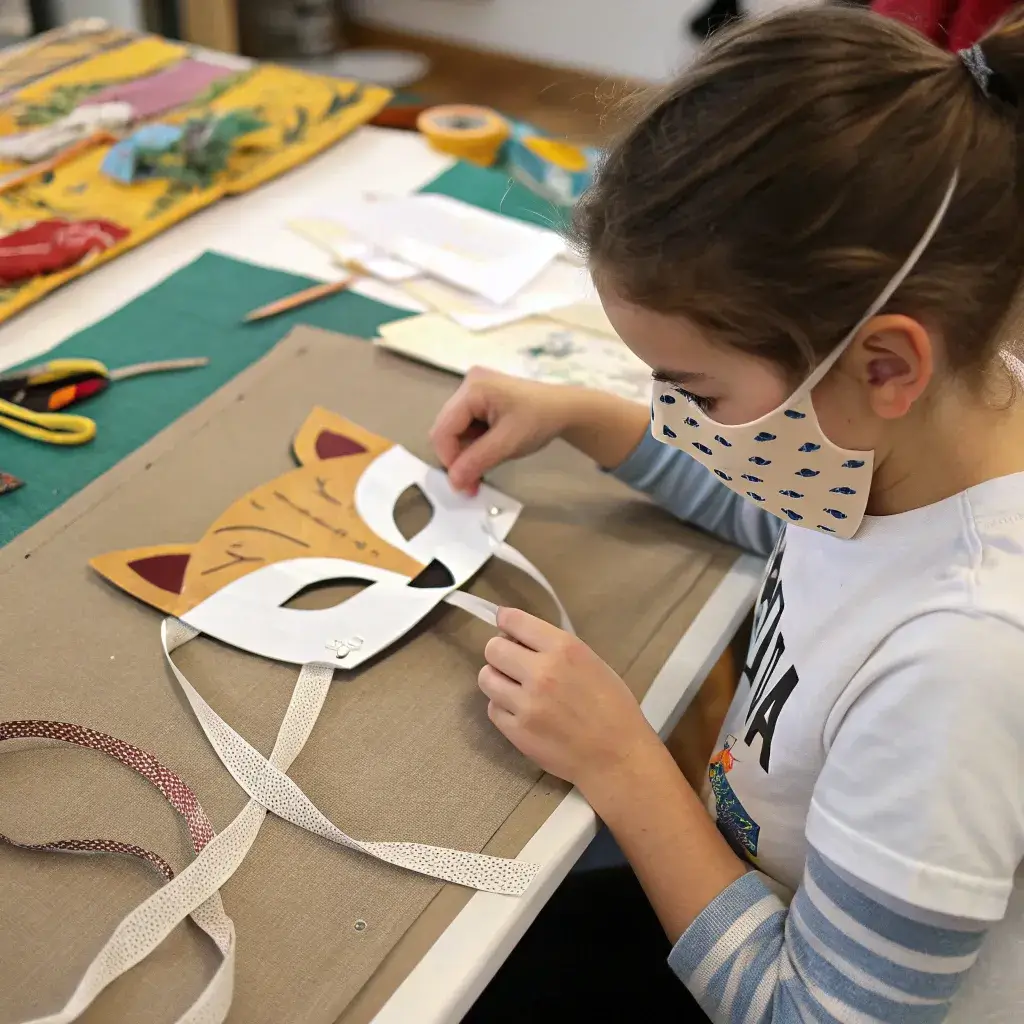
4. Attach Straps or Ribbons
Once the mask is decorated and the features are glued into place, it’s time to attach the elastic strap or ribbon.
- Elastic string: Measure your kid’s head for a comfy fit, then snip some elastic string that’s snug but not too tight. Glue or tape the ends to the mask’s sides. I love elastic ‘cause it stretches—my niece wore her cat mask all day with no complaints.
- Ribbon: Ribbons are so pretty if you want a softer vibe. Pick colors that match the mask or just go plain. Tie ‘em behind the head for an adjustable fit. I tried this, but my knot-tying skills? Total mess.
- Headband option: Not into strings? Glue the mask to a headband for a sturdy, cute look—like a wild animal hair accessory. My nephew hated elastic digging into his cheeks, so this was a lifesaver for his bear mask.
5. Personalize the Mask Further
- Whiskers: Stick on some craft wire, string, or skinny pipe cleaners for whiskers around the nose or upper lip. They make cats, foxes, or bunnies look so lively. I used pipe cleaners for my niece’s rabbit mask, and she kept twirling ‘em like a villain mustache.
- Tail (optional): For a lion or fox, cut a long strip of fabric or felt for a tail and glue it to the mask’s back so it dangles. It’s such a cute touch. My nephew’s fox tail got caught on everything, but he was obsessed with it anyway.
6. Make It Interactive
If you want to take the crafting experience even further, consider adding interactive elements:
- Movable features: Make it interactive by adding a brad fastener to let the mouth or ears wiggle. I put a movable mouth on my nephew’s wolf mask, and he spent all evening howling and flapping it—total hit.
- Light-up elements: Slap on some glow-in-the-dark paint or stickers for a magical vibe. They’re awesome for evening playtime or parties. I tried glow stickers on a cat mask once, and my niece swore she was a “night kitty.” Glowy stuff’s a game-changer.
Safety Check
Before you call the mask done, take a sec to check for anything sketchy, like sharp edges or tiny bits that could be a choking hazard. I totally missed a rough spot on my nephew’s fox mask once, and it nearly tore his sleeve. Make sure the eye holes are big enough so your kid can see without squinting—my niece’s first mask was like wearing blindfolds, oops. Also, double-check that any strings or ribbons are stuck on good but not so tight they’re uncomfortable. You want it safe and comfy so they can run around roaring or hopping without a hitch.
Creative Ideas for Crafting Animal Masks for Kids
Fun Animal Masks for Kids: Crafting a Lion or Tiger
Lions and tigers are go-to picks when it comes to making animal masks—there’s just something timeless about them. If you’re making a lion, start with a yellow or orange base, then add a mane by gluing strips of paper all around the edges. It doesn’t have to be perfect—honestly, the messier the mane, the better it looks. For the nose and whiskers, black paper or even bits of yarn work great. Now, if you’re leaning more toward a tiger, it’s all about those bold black stripes over an orange background. Don’t skip the ears—make them sharp and slightly tilted for a bit of drama. And if you want to take it a step further, add some face paint. It really pulls the whole wild-animal look together.
How to Create Animal Masks for Kids Using Recycled Materials
Making animal masks out of recycled stuff isn’t just fun—it’s actually pretty clever. You get to be creative and eco-friendly at the same time, which feels like a win-win. Egg cartons? They’ve got just the right shape for a lion’s nose. Bottle caps give the mask some dimension—those little raised eyes always pop. And cardboard tubes? They practically ask to be turned into elephant trunks. What’s great about using these kinds of scraps is that it turns regular old junk into something imaginative. Kids don’t even realize they’re learning about recycling and sustainability while they’re having fun cutting, gluing, and painting. And the best part? All the weird little textures and shapes—things you’d never find in craft store kits—make every mask look totally unique.
Craft Animal Masks: Exploring Different Animal Themes
Animal masks don’t have to stop at lions and tigers. There’s a whole jungle out there to explore—why not try a bear, a monkey, or even something a little more unexpected, like a zebra or a crocodile? Each one gives you a chance to play with different shapes and colors, which keeps things interesting. If you’re making a giraffe, you could add long yellow neck pieces sticking out from the sides—it doesn’t have to be perfectly realistic. A crocodile mask? That one’s all about the snout and those jagged teeth. Let your child help decide what details to add. It’s part of the fun, and honestly, the sillier it looks, the better.
Why Crafting Animal Masks Is the Perfect Family Activity
Craft Animal Masks for Kids: A Fun, Bonding Experience
You’d think making animal masks is just a way to pass the time—but honestly, it becomes something else pretty quickly. You’re sitting there, cutting bits of paper, gluing ears on crooked, laughing at how weird your lion looks… and then suddenly, you’re just there with each other. No distractions. No screens. Just hands busy and minds wandering. There’s a kind of teamwork in figuring out how to make a giraffe snout out of cardboard. It’s silly, sure, but that’s kind of the magic. And while you’re chatting about animals or whatever comes up, kids are learning stuff without even realizing it. But more than that, it just feels nice. Like you’ve shared something real. And those moments—where everyone’s a little messy, a little proud of what they made—they stick around.
How Making Animal Masks for Kids Encourages Creativity
Honestly, animal masks are way more than just a fun craft for kids. It’s like giving them this little space to do whatever they want—pick any animal, mash things up, throw on wild colors. Sometimes they make the weirdest, coolest creatures you wouldn’t even think of. And yeah, it might look like just play, but really, they’re learning to think differently, make choices on their own, and just let their brains wander. That kind of creativity? It’s the stuff that sticks with you. So, making masks? It’s kind of simple but actually pretty powerful when you think about it.
Craft Animal Masks for Kids: An Engaging Way to Learn
You know, making animal masks is kind of a sneaky way to mix creativity and learning. Kids don’t even realize they’re picking up stuff—like where animals live or what they eat—because they’re busy having fun. And the hands-on part, like cutting and gluing? That’s actually helping with their coordination and focus, even if it doesn’t feel like work. So yeah, it’s play, but also way more than that. It’s like learning without the boring bits. Which is pretty neat, if you ask me.
Top Tips for Crafting Animal Masks for Kids Like a Pro

How to Craft Animal Masks for Kids with Professional Finish
Honestly, having sharp scissors on hand just changes the game. Clean cuts? Yeah, they make everything look a bit more finished, you know? And if kids take their time coloring, it’s not just scribbling — they start playing with shading and tiny details that really bring the mask to life. Throwing in some fabric or felt? That’s where things get cool — suddenly the mask feels interesting to touch, not just look at. A sprinkle of glitter doesn’t hurt either, as long as it’s not too much — just enough to catch the eye. And when you help with gluing—making sure it’s neat and in the right spots—it keeps the whole thing from falling apart during all the running around. So yeah, it’s a little mix of creativity and simple tricks that make the mask look really great and hold up well.
Craft Animal Masks for Kids: Avoid These Common Mistakes
Getting the fit right is really important if you want the mask to be comfy and actually get worn. I always check the elastic or ribbon length before I finish—avoids those annoying surprises later on. Waiting for the glue to dry? Sounds obvious, but it’s easy to rush and then end up with sticky fingers or a mess. And lightweight materials? They make a huge difference—no one wants to wear a mask that feels like a brick on their face, especially kids. Just avoiding these little hiccups makes the whole craft time way smoother and more fun for everyone involved.
Tips for Craft Animal Masks for Kids: Make the Project Last
When the masks are all done, it’s a good idea to help your kiddo keep them safe for a while. One trick is putting clear tape over the decorated areas—it kind of seals everything in and keeps it from getting messed up. And if your child really loves their mask, maybe tuck it away gently in a box or even hang it up on the wall as a little trophy. That way, it sticks around longer and doesn’t get all crumpled or torn. Makes the whole thing feel special, you know?
How to Make Animal Masks for Kids with Everyday Household Items
Craft Animal Masks for Kids with Paper Plates and Markers
Honestly, one of the easiest ways to make an animal mask is just using a paper plate as your base. You can have your kid color it however they want to match their animal—like yellow or orange for a lion, or browns for a bear. Cutting out the eye holes is pretty simple, and then you just add some string or elastic to make sure it fits right. It’s quick, doesn’t cost much, and still ends up looking pretty cool. Perfect for when you want something fun but don’t want to spend all day on it.
How to Craft Animal Masks for Kids from Recycled Paper
So, using recycled paper for animal masks? Honestly, it’s kind of a cool way to get creative without much hassle. You just grab whatever’s lying around—old magazines, scraps, maybe some newspaper—and cut or tear it however you want. Sometimes those random patterns or colors actually end up looking way better than you’d expect. And, yeah, it sneaks in that recycling thing without making it feel like a lesson, which is always a plus. Plus, it just feels good to turn stuff you’d toss into something fun, you know?
Creative Ways to Craft Animal Masks for Kids Using Household Supplies
Take a quick look around your place—you’d be surprised what you can find for crafting. Cotton balls, little bits of fabric, even some old socks can add all kinds of fun textures to an animal mask. Like, you could glue cotton balls around the edges of a bear mask to make it look all fluffy, or use fabric scraps to make big elephant ears. Honestly, the possibilities are kind of endless, and it’s a neat way to show kids how to reuse stuff creatively instead of just tossing it out.
Making animal masks with kids is honestly such a great way to mix fun, learning, and creativity all in one go. It’s simple and easy enough that anyone can jump in, whether it’s for a school project, a party, or just killing time on a lazy afternoon. The best part is how open-ended it is—you really can go anywhere with it. So grab whatever you have lying around, let the kids’ imaginations take over, and just dive in.
FAQs
1. What materials do I need to craft animal masks for kids?
You’ll need paper plates, scissors, glue, markers or crayons, elastic string or ribbons, and any extra embellishments like yarn, googly eyes, or fabric.
2. How can I make a lion mask for kids?
Start with a yellow or orange base, add paper strips for the mane, and glue on a nose and whiskers. You can also use face paint for additional details.
3. Can I use recycled materials to craft animal masks?
Yes, you can use materials like egg cartons, cardboard tubes, and bottle caps to create unique features for your masks, making them eco-friendly.
4. How do I make an animal mask stay on my child’s face?
Attach an elastic string or ribbon to the sides of the mask to secure it comfortably on your child’s face.
5. What are some animal mask ideas for kids?
Try making masks of lions, tigers, bears, monkeys, giraffes, or even more exotic animals like pandas or crocodiles for a fun variety of options.