
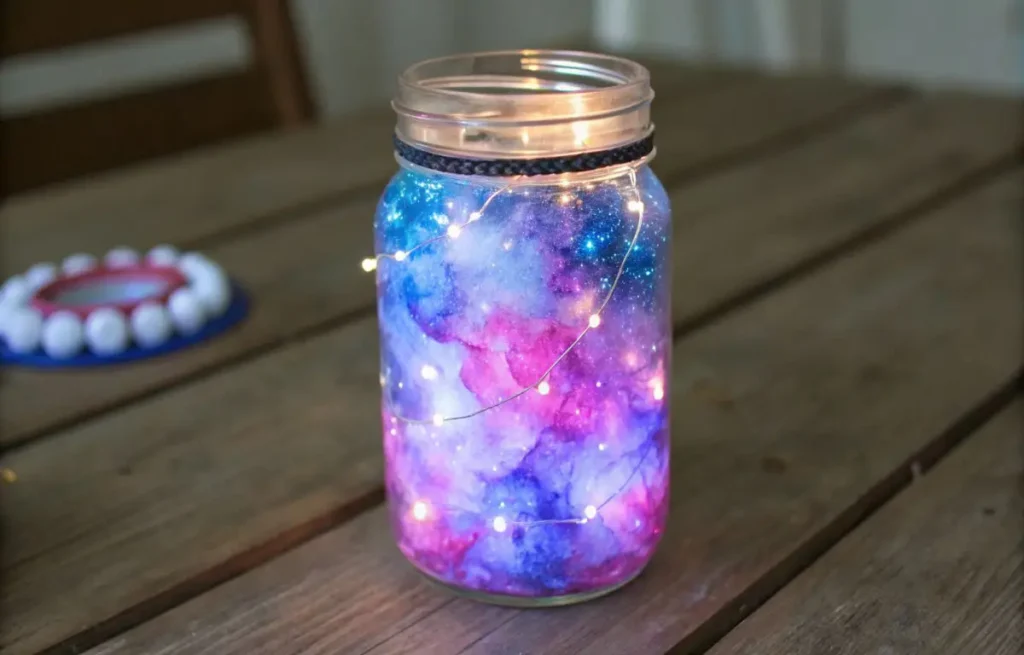
I don’t know what it is about galaxy jars, but they just hit different. They’re simple, yeah — just some cotton, paint, glitter, and a jar — but the result feels kind of magical. Like you’ve trapped a little piece of the night sky and now it lives on your shelf. We made a few last summer for no reason at all, and somehow they ended up being everyone’s favorite room decor. They also make surprisingly good little gifts, if you’re into that sort of thing.
Anyway, if you’ve never made one, this is your sign. It’s easy, it’s chill, and it looks amazing when it’s done.
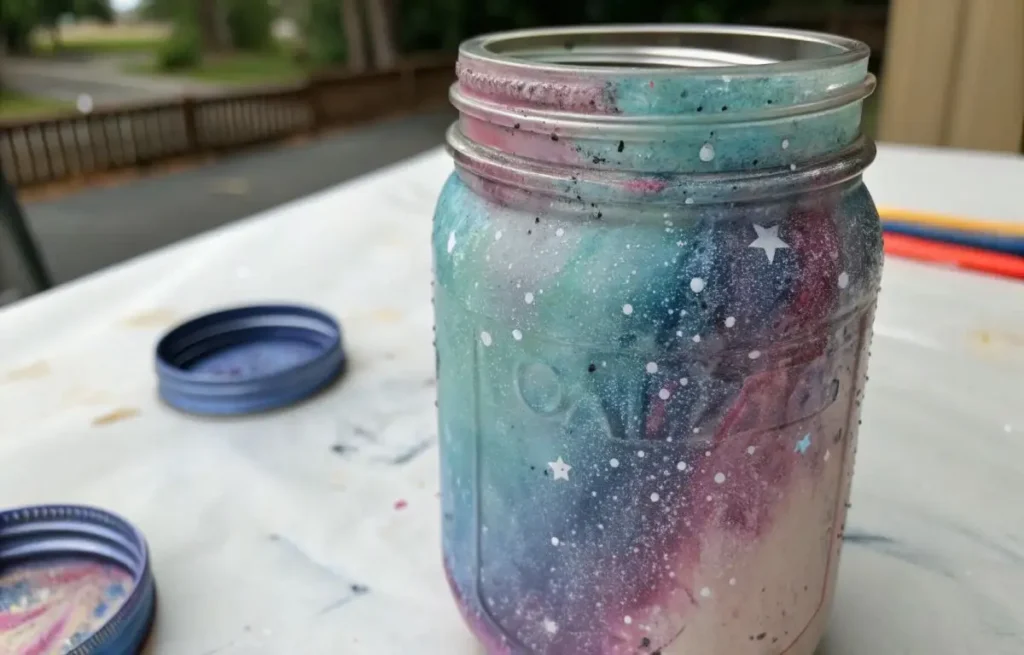
DIY Galaxy Jar Decoration: A Step-by-Step Guide
Before diving into colors and paints, it’s crucial to choose the right jar. A mason jar is the most popular option, butYou don’t need a mason jar to make a galaxy jar—any clear glass jar works as long as it’s see-through to let that cosmic glow pop. I used an old pickle jar once, and it was like holding a starry sky. Transparency’s the trick for that mesmerizing nebula vibe.
Choosing the Perfect Mason Jar for a Stunning Display
Pick a jar size that fits your vibe—big ones give you room for bold, dramatic galaxies, but small ones are just as dreamy for tight spaces. I went overboard with a huge jar last week, and it’s basically a spaceship on my shelf now, though I wish I’d tried a tiny one for my desk.
Must-Have Materials for a Breathtaking Galaxy Jar
To make your galaxy jar sparkle, grab these: a clear mason jar (or any clear jar), acrylic paints in blue, purple, pink, and black, cotton balls for that nebula fluff, glow-in-the-dark paint for extra magic, LED fairy lights for a twinkly glow, and glitter for starry vibes. I forgot the glitter once, and my jar still worked, but it was less… cosmic.
Crafting a Vivid Nebula Effect with Cotton and Paint
This is where the magic happens—turning a plain jar into a galaxy that feels out of this world. Here’s how to nail that vibrant, textured nebula look with just a few supplies.
Step 1: Prepare the Base Layers
Get your stuff ready before painting—it’s a mess otherwise, trust me, I learned that the hard way. Start with deep colors like blue, purple, and black to mimic space’s vastness. Dab or swirl them inside the jar with a sponge or brush, keeping it soft and flowy, like a nebula’s gas clouds. Blend for a gradient effect, dark to light. I went nuts layering purple once, and it looked like a black hole—cool, but intense.
Step 2: Adding Texture with Cotton Balls
Once the paint’s dry, grab cotton balls for that cloudy nebula texture. Tear them into fluffy bits—smaller for wispy clouds, bigger for bold ones. I ripped mine too fast and got fluff everywhere. Gently tuck the cotton inside, along the edges or floating free, to look like clouds emerging from the painted space. Layer it over the paint for a dreamy, 3D effect.
Step 3: Adding Lighter Colors and Details
Now add highlights to make it pop. Use white, light blue, or a touch of pink with a fine brush or sponge, dabbing lightly over the dark colors for starry glows. Smudge white into the cotton for a soft, glowing look—I tried this and got legit star vibes, though my pink was a bit Barbie-ish. Keep it subtle to let the dark base shine through.
Step 4: Final Touches
Sprinkle in fine glitter or tiny beads for a starry sparkle—my jar looked flat ‘til I added glitter, total game-changer. Layer more cotton on the edges for extra depth if you want it super dynamic. It’s like building a mini universe, and I’m still finding glitter on my table weeks later.
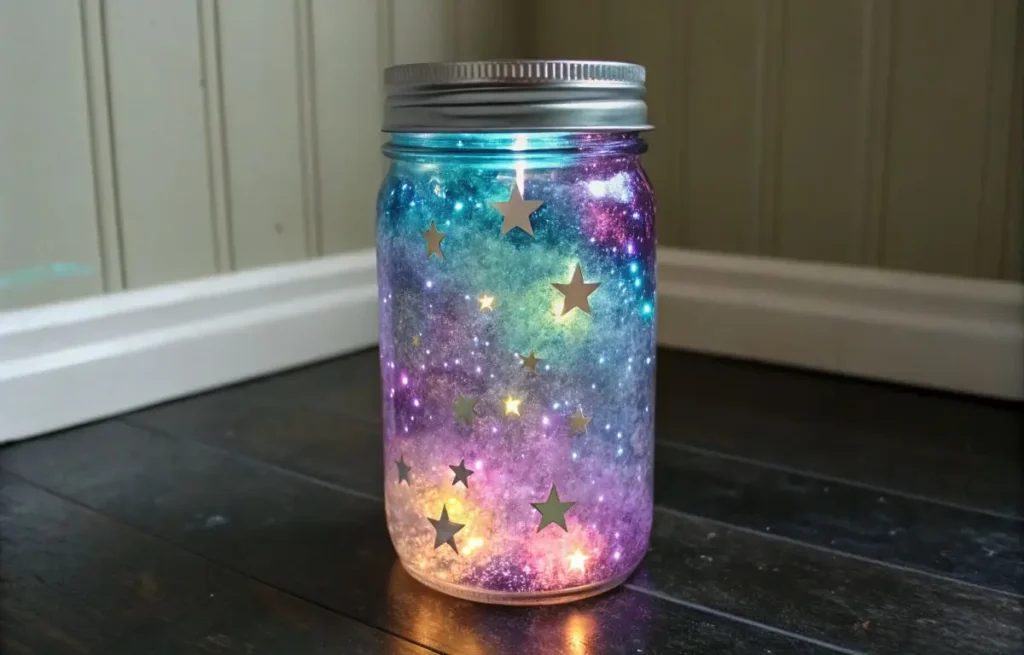
Step 5: Seal and Display
Let the jar dry completely—I got impatient once, and the paint smeared. Seal it with a lid to keep everything in place if you want. Then display it somewhere it’ll catch eyes, like a shelf or table. Your galaxy jar’s a glowing, textured masterpiece that’s honestly too cool for words.
Best Color Combinations for a Celestial Glow
Color’s the secret sauce for making your galaxy jar look like a slice of the night sky. The right shades, blended just so, will have it glowing like a starry dream.
Understanding Color Blending for a Cosmic Aesthetic
To get that spacey vibe, blend colors from dark to light, like the sky fading from dusk to midnight. I start with deep blues or blacks at the jar’s bottom, then work up to purples and pinks near the top. I tried this last night, and it’s like my jar’s got infinite depth, though I smudged a bit too much black at first. Swirl gently for a gradient that feels like the cosmos unfolding.
Top Paints and Glow Pigments for a Luminous Effect
Acrylic paints are your go-to, but glow-in-the-dark pigments are the real magic—I added some to my jar, and it lights up like a mini galaxy in the dark. Stick with matte-finish paints; I used glossy once, and it killed the depth, total rookie move. Those pigments make your jar sparkle like stars, even when the lights are low.
How to Layer Colors for a Mesmerizing Starry Look
Layering’s key for that nebula glow. Start with dark hues, then dab on lighter ones like white or pink. I tossed in some metallic gold and silver for shimmery stars—looked so cool, though I got glitter everywhere. Build it up slowly to keep it natural, and your jar will feel like a piece of the universe, even if your table’s a sparkly mess now.
Adding Magical Effects to Your Galaxy Jar Decoration
Once your colorful layers are set, it’s time to sprinkle in some extra sparkle to make your galaxy jar truly cosmic. These little tweaks turn a plain jar into a starry masterpiece that’ll have everyone ooh-ing.
Enhancing Your Jar with Glow-in-the-Dark Accents
Glow-in-the-dark stuff is non-negotiable for that spacey magic. I dabbed some glow-in-the-dark paint inside my jar last night, and when the lights went out, it was like holding a nebula. You can also sprinkle in glow powder—it gives this soft, dreamy shine. My first try was a bit patchy, but it still felt like I bottled a galaxy.
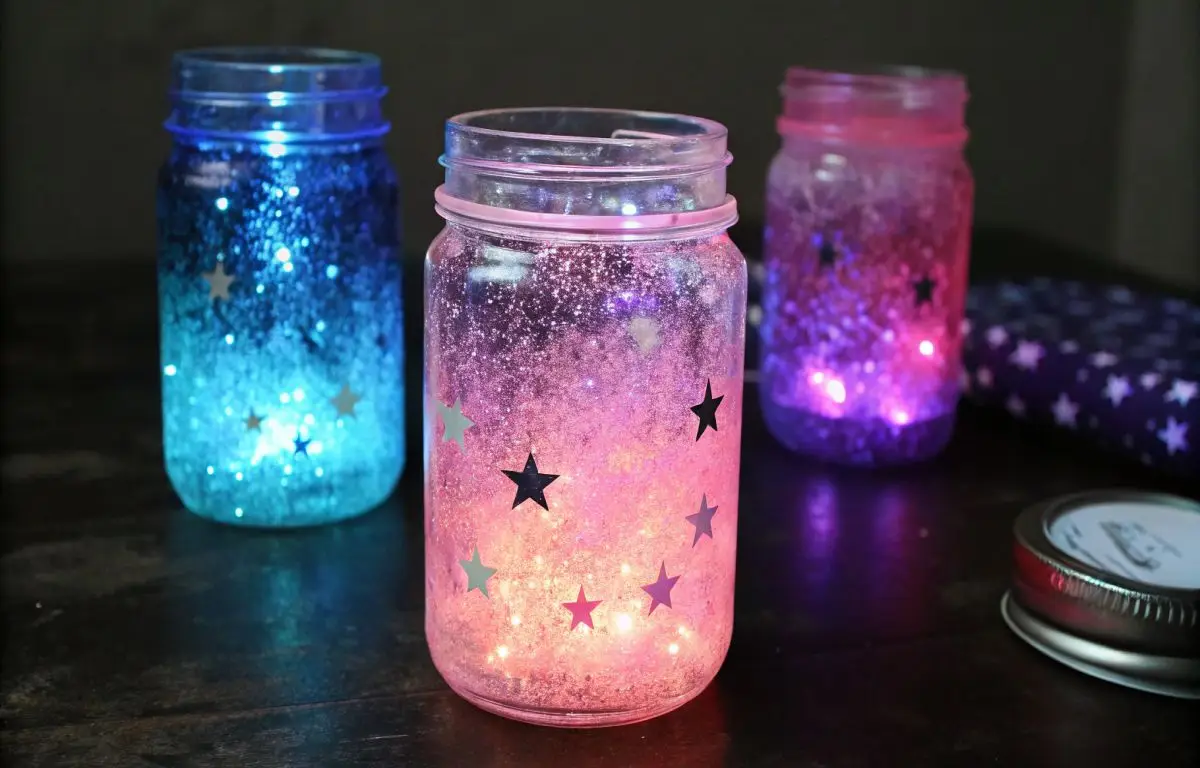
Using Glitter and Sparkles for a Twinkling Star Effect
To make those stars pop, toss in some glitter or star-shaped sparkles. I went wild with glitter once and ended up with a sparkly kitchen floor, but it was worth it—my jar twinkles like the night sky. Mix it with the cotton balls or dust it over the paint for a starry shimmer that catches every light.
LED Fairy Lights: Bringing Your Cosmic Creation to Life
The real showstopper? LED fairy lights. I tucked some at the bottom of my jar, and when I flipped them on, it was like my galaxy came alive. Place them at the top or bottom—doesn’t matter, just don’t cram too many like I did and short out a string. It’s the glow that makes your jar feel like a piece of the universe.
Stunning Ways to Display Your Galaxy Jar at Home
Your galaxy jar’s done, and now it’s time to find it a home where it can shine! Picking the right spot and adding some cosmic flair makes this little jar a total showstopper.
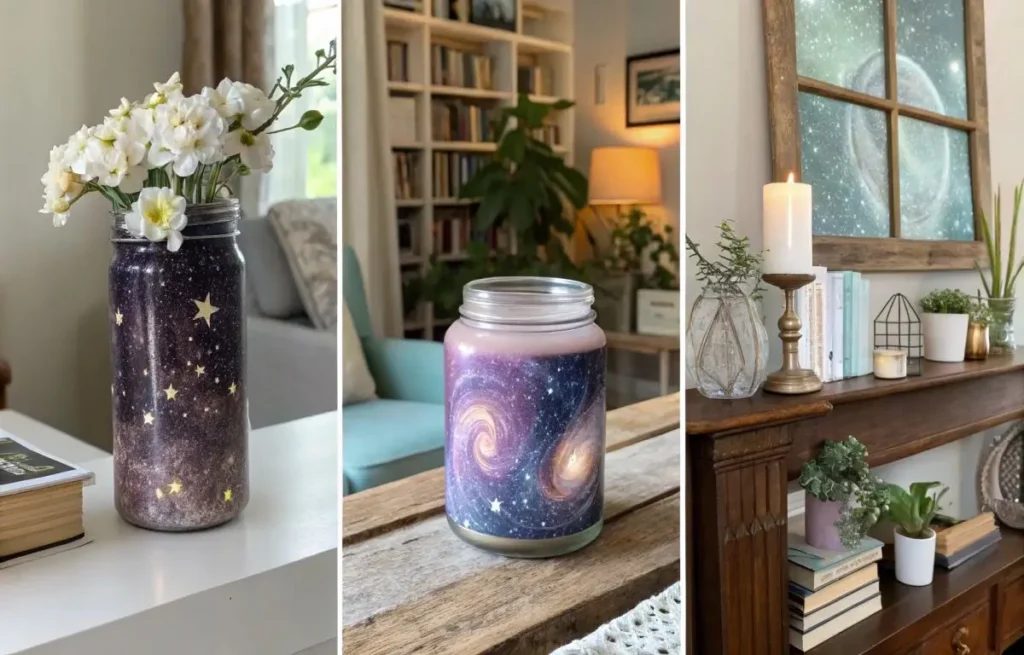
Choosing the Best Spot for a Mesmerizing Glow
Put your galaxy jar somewhere its glow can steal the show—like a nightstand, shelf, or coffee table. I stuck mine on my bookshelf, and it’s like a mini universe lighting up my room. You can even hang it from the ceiling for a floating galaxy vibe, though I haven’t tried that yet ‘cause I’m scared I’ll drop it.
Pairing Your Galaxy Jar with Space-Themed Decor
To crank up the cosmic feels, toss in other spacey stuff. I paired my jar with some starry curtains and a moon-shaped lamp—total sci-fi vibes! Celestial artwork works too. It pulls the room together, making my jar the star of the show, even if my curtains are a bit crooked from my DIY sewing attempt.
DIY Display Stands and Holders for an Artistic Touch
Want your jar to feel extra special? Make a custom stand! I messed around with some wire and wood scraps to craft a little holder, and it gives my jar this artsy edge, even if it’s a bit wobbly. Use metal or whatever you’ve got—anything that matches the jar’s vibe. It’s a fun way to show off your creation and make it look fancy without much effort.
Avoiding Common Mistakes When Crafting a Galaxy Jar
Making a galaxy jar is a blast, but a few slip-ups can dim your cosmic vibe. Here’s how to keep your project sparkling, based on my own messy trial-and-error.
Why Your Colors Look Faded and How to Fix Them
Nothing’s worse than a galaxy jar that looks washed out. My first one was dull as dishwater ‘cause I skimped on paint. Lay it on thick, letting each layer dry fully before the next—I learned to be patient after that flop. If your colors still look meh, pile on more layers or grab opaque paints for that vibrant starry punch.
Avoiding Too Much Water for a Crisp Nebula Effect
Too much water in your paint mix is a nebula killer—mine turned into a muddy mess once, ugh. Keep water to a minimum and use thick paint for sharp, bold layers. I tried diluting less, and my clouds finally looked crisp, like a proper galaxy instead of swamp water.
The Right Way to Seal and Preserve Your Galaxy Jar
To keep your jar glowing for ages, seal it right. I forgot to varnish my first jar, and the colors chipped faster than my nail polish. Brush on a clear varnish to lock in those hues and protect against fading. It’s a quick step that makes your cosmic creation last, even if you get varnish on your fingers like I did.
Conclusion
Whipping up a galaxy jar is such a fun way to bring a bit of the universe home. With just a few supplies, you can make a glowing masterpiece that lights up any room. Stick to these tips to dodge the usual pitfalls, and your jar will shine like a star, even if your craft table’s a glittery disaster like mine. Happy crafting!
People Also Read
DIY Reed Diffuser Tips: Scent Combinations You’ll Love
Homemade Bath Salts Recipes: Benefits & DIY Guide
Upcycling Trash into Treasure: Creative DIY Projects
FAQs
What stuff do I need for a galaxy jar?
Grab a clear mason jar, some acrylic paints—think blue, purple, pink, black—plus cotton balls, glow-in-the-dark paint, LED fairy lights, and a sprinkle of glitter. I skipped glitter my first go, and my jar was like a shy star, not quite shining.
How do I nail that galaxy effect in the jar?
Swirl dark paints like blue and purple with a sponge for a spacey vibe, then tuck in cotton balls for that cloudy, nebula texture. I got a bit sloppy with the sponge once, but it still looked like a cosmic swirl, so don’t sweat it.
Can I use any jar for this galaxy thing?
Yup, any clear jar works fine, though mason jars are the crowd favorite for their size and old-school charm. I used a random salsa jar once, and it was still out-of-this-world cool.
How do I make my galaxy jar glow in the dark?
Slather on some glow-in-the-dark paint or dust in glow powder, then pop in LED fairy lights for extra sparkle. My jar lit up like a UFO when I added lights—total magic, even if I tangled the wires.
Where’s the best spot to show off my galaxy jar?
Stick it on a nightstand, shelf, or coffee table where its glow can steal the show. Near a window’s awesome for catching light, but I knocked mine off a shelf once, so maybe keep it steady.